
Recipes and food chatter from a girl with too much time on her hands.
Wednesday, November 22, 2006
I'm off!
Chris and I are headed down to the beach, where we plan to have lobster instead of turkey. Yesss. I hope all of you have happy, healthy, and delicious Thanksgivings!
Tuesday, November 21, 2006
Bread, again, some more.
Yes, I made the bread again. This recipe has become quite the Internet phenomenon! This time I made some notable changes and the results were worth mentioning.
From Rose, I got the idea to sub 3 Tbsp. of whole wheat flour for an equal amount of white flour. Then I watched the video one more time before they started charging for it, and noticed that Jim Lehey just scoops the flour out with his measuring cup--rather than lightly spooning flour into the cup, as I've been taught to do. Using this method, I am probably using more flour, which left me with a much more manageable dough. I was also much more generous with the flouring of the dough and surfaces. Lastly, I used 1.5 cups of water, as was called for in the video, but not the recipe.
My dough, as I mentioned, was much easier to handle and behaved as it was supposed to. The resulting bread was another triumph and I can't wait to make it again and again and again. Sadly, for this go I was so swept up in the results that I didn't take a picture (horrors!), but it rose more and had a terrific flavor.
Friday, November 10, 2006
The Best Bread I've Ever Made.
Sticking my head above the towering pile of freelance work I'm buried under (not that I'm complaining one bit! Yay money!), to tell you to try this recipe. It's weird, and not quite perfect, but it produced the absolute best bread that has ever come out of my oven. Thin, crackling crust, airy, gorgeous crumb, and it's delicious too.

In case the Times decides to start charging for the article after a couple of weeks, here it is. A word of caution: in the accompanying video only 1.5 cups of water is called for, and I think that's what should be used. My dough was beyond loose and shaggy--it was more like trying to handle a thick pancake batter. But still, even though the whole time I was working with it I was sure it wasn't going to work, it was fantastic.

No-Knead Bread
makes one 1.5 pound loaf
Originally published by Mark Bittman in the New York Times
Adapted from Jim Lahey, Sullivan Street Bakery
Time: About 1½ hours plus 14 to 20 hours rising
3 cups all-purpose or bread flour, more for dusting
¼ teaspoon instant yeast
1¼ teaspoons salt (note: I use a heaping two teaspoons of salt)
Cornmeal or wheat bran as needed.
1. In a large bowl combine flour, yeast and salt. Add 1 5/8 cups water (very important note: this amount should be 1.5 cups but was misprinted in the Times), and stir until blended; dough will be shaggy and sticky. Cover bowl with plastic wrap. Let dough rest at least 12 hours, preferably about 18, at warm room temperature, about 70 degrees.
2. Dough is ready when its surface is dotted with bubbles. Lightly flour a work surface and place dough on it; sprinkle it with a little more flour and fold it over on itself once or twice. Cover loosely with plastic wrap and let rest about 15 minutes.
3. Using just enough flour to keep dough from sticking to work surface or to your fingers, gently and quickly shape dough into a ball. Generously coat a cotton towel (not terry cloth) with flour, wheat bran or cornmeal; put dough seam side down on towel and dust with more flour, bran or cornmeal. Cover with another cotton towel and let rise for about 2 hours. When it is ready, dough will be more than double in size and will not readily spring back when poked with a finger.
4. At least a half-hour before dough is ready, heat oven to 450 degrees (note: 500 degrees works even better). Put a 6- to 8-quart heavy covered pot (cast iron, enamel, Pyrex or ceramic) in oven as it heats. When dough is ready, carefully remove pot from oven. Slide your hand under towel and turn dough over into pot, seam side up; it may look like a mess, but that is O.K. Shake pan once or twice if dough is unevenly distributed; it will straighten out as it bakes. Cover with lid and bake 30 minutes, then remove lid and bake another 15 to 30 minutes, until loaf is beautifully browned. Cool on a rack.
Monday, October 02, 2006
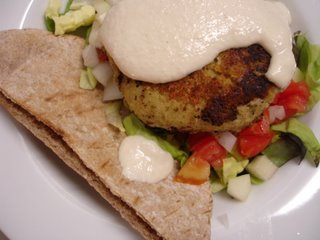
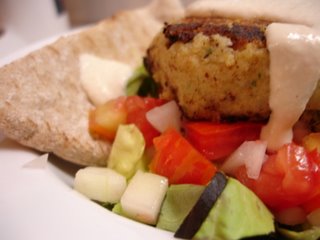
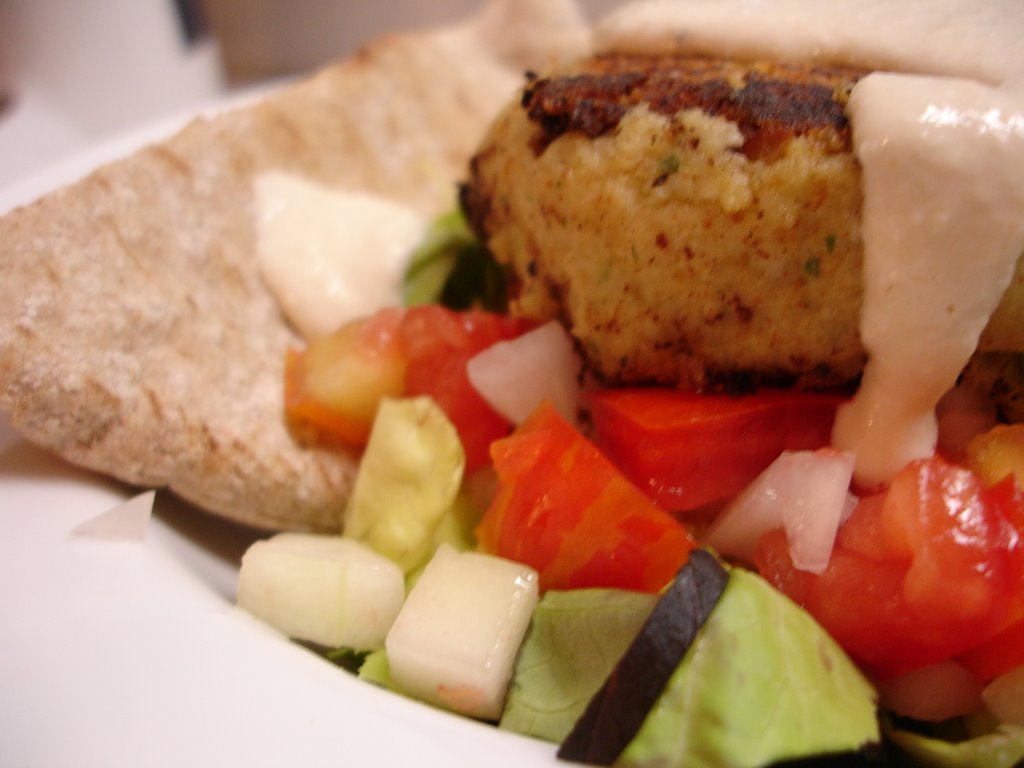
Open-Faced Falafel Burgers
So, as I mentioned briefly earlier, I've been trying to watch my calorie intake these days. I truly hate the word "diet", but I guess that's what I've been on. Why? Well, my reviewing job makes it my business to eat a lot of really great food, and I can't afford new pants. Therefore, dieting must be done so I can continue wearing the nice pants I already own.
So, because of this new endeavor, I've taken up an interest in Cooking Light magazine. While following recipes to the letter isn't my idea of fun, I have found that sticking to their recipes gives me a clear idea of how many calories I'm taking in, and while it may not get the creative juices flowing, it does keep me in my current clothing.
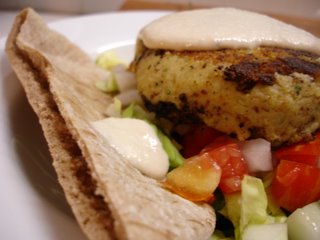
And so, a recent CL recipe attempt was their Open-Faced Falafel Burgers, which really turned out to be fantastic. Really hearty and satisfying, healthy, and pretty to boot. Plus, I used a surplus of sesame seeds and made my own tahini instead of using store-bought stuff, so I was able to feel minorly inventive. I highly recommend this recipe.

So, because of this new endeavor, I've taken up an interest in Cooking Light magazine. While following recipes to the letter isn't my idea of fun, I have found that sticking to their recipes gives me a clear idea of how many calories I'm taking in, and while it may not get the creative juices flowing, it does keep me in my current clothing.
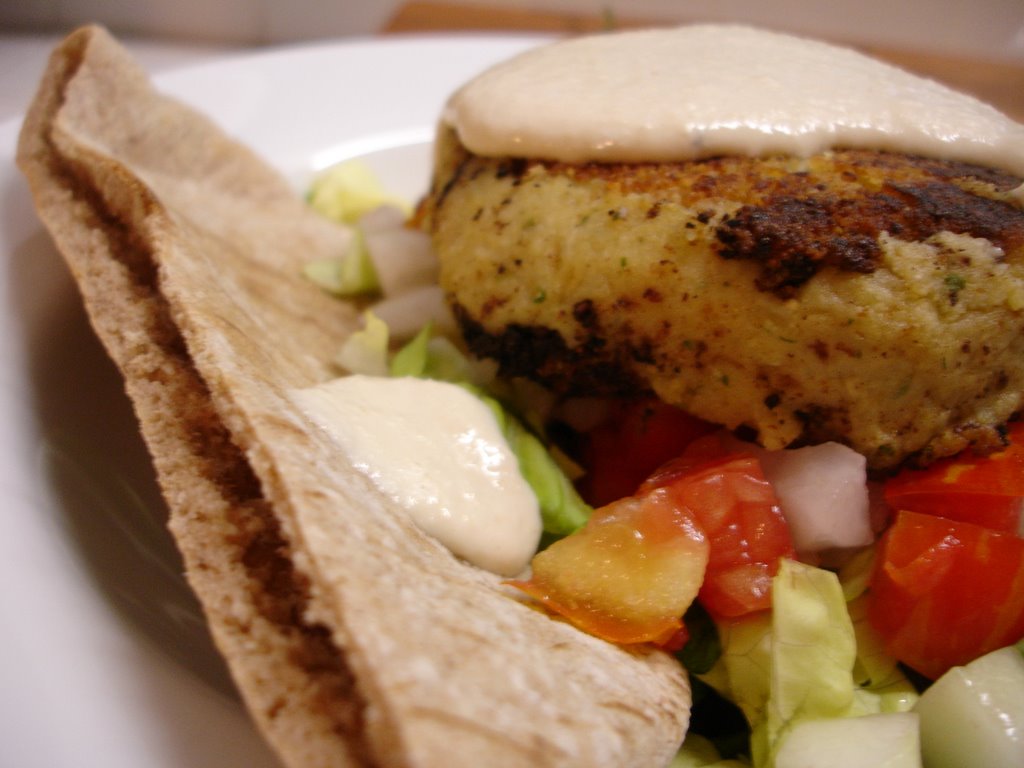
And so, a recent CL recipe attempt was their Open-Faced Falafel Burgers, which really turned out to be fantastic. Really hearty and satisfying, healthy, and pretty to boot. Plus, I used a surplus of sesame seeds and made my own tahini instead of using store-bought stuff, so I was able to feel minorly inventive. I highly recommend this recipe.
Sunday, October 01, 2006
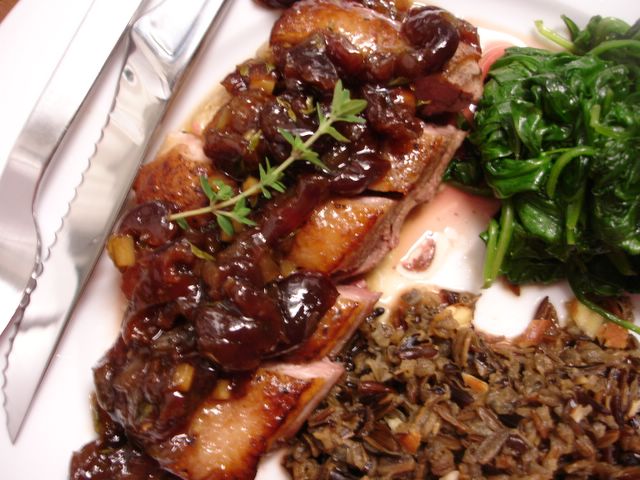
Seared Duck Breasts with Cherry Wine Reduction
Hey there! Before I get into this crazy wonderful meal from a while ago, I wanted to pass along an update for you guys. Cityview Magazine is working on updating their website (it's a mess right now, don't bother), so my reviews are still not available online. However, I might ask if I can scan them and post them here, if anyone is interested. The new job is going very well, I'm eating some fantastic food, and this month I even have a feature article with an original recipe! Pretty cool. They are supremely great to work with.

And now to dinner. And what a dinner! One of the things I love about my new food writing job is meeting people that share my passion for food. Last month I met William Carithers, who owns an upscale meat market here in Knoxville. This is one of the only places in town to get fresh duck and a multitude of other offerings. I couldn't resist the duck breasts, since duck is both mine and Chris' favorite, and so I brought four of them home (they are sold in groups of four, but William split them up and vacuum sealed them so I could freeze two).

I, like many people, prefer duck seared and topped with a fruit-based reduction. And so that is what I set out to do, working off of a memory of a white wine and dried cherry sauce I once had on duck. Served alongside some wild rice and (pre-e. coli) wilted spinach, you'll have to take my word for it when I tell you the results were divine. Recipe to follow very soon, once I decipher my notes...

Saturday, September 30, 2006
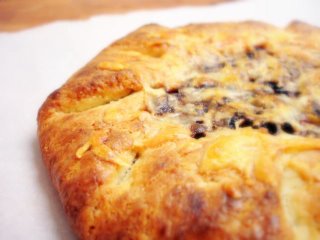
Three-Onion Tart and Corn Bisque--the kitchen is finished!
That's right, the over-two-week long kitchen renovation is complete, and things are looking mighty fine. Not everything is clean and back in its place just yet, so you will have to wait for photos of our accomplishment, but even better than kitchen photos?
Food photos! I am finally able to cook a complete meal in my kitchen again. While there's been some cooking in the past couple of weeks, it hasn't come easily and creativity has not really been an option.
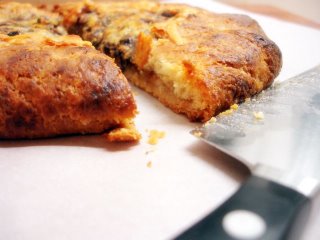
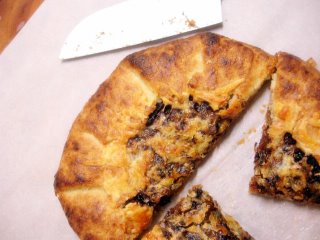
So, I read Elise's blog fairly religiously--she always strikes a perfect balance between education and really creative cooking--and when she posted this recipe for a rustic onion tart earlier this week, I knew I had to make it. What better way to get back in the kitchen than with a baking project? I followed her recipe nearly to the letter (her pastry recipe is perfection), with one exception--I only had one red onion, so I also used two yellow onions and a massive shallot I had sitting around--thus the "Three Onion" distinction. This is a beautiful tart to look at, folks, and even better tasting. Go celebrate the cooling weather and make one for yourself!

The soup was born out of inspiration from a Cooking Light recipe (I've been on a dreaded diet, yet another reason I haven't been posting much), and with a couple of ears of late summer sweet corn languishing in the refrigerator, I couldn't resist making it my own. The result was sweet, delicious, and deceptively rich-tasting. Topped with a mound of fresh crab meat, a sprinkling of heirloom tomato, and chunks of ripe avocado, I felt it was a fitting goodbye to summer.


Food photos! I am finally able to cook a complete meal in my kitchen again. While there's been some cooking in the past couple of weeks, it hasn't come easily and creativity has not really been an option.

So, I read Elise's blog fairly religiously--she always strikes a perfect balance between education and really creative cooking--and when she posted this recipe for a rustic onion tart earlier this week, I knew I had to make it. What better way to get back in the kitchen than with a baking project? I followed her recipe nearly to the letter (her pastry recipe is perfection), with one exception--I only had one red onion, so I also used two yellow onions and a massive shallot I had sitting around--thus the "Three Onion" distinction. This is a beautiful tart to look at, folks, and even better tasting. Go celebrate the cooling weather and make one for yourself!


The soup was born out of inspiration from a Cooking Light recipe (I've been on a dreaded diet, yet another reason I haven't been posting much), and with a couple of ears of late summer sweet corn languishing in the refrigerator, I couldn't resist making it my own. The result was sweet, delicious, and deceptively rich-tasting. Topped with a mound of fresh crab meat, a sprinkling of heirloom tomato, and chunks of ripe avocado, I felt it was a fitting goodbye to summer.


Thursday, August 31, 2006
What Is A Girl To Do?
So tell me, what does a good, food-adoring gal do when her stomach decides to protest anything other than bread, rice, buttered pasta, and its ilk? When that girl is literally ordered to avoid all of the gloriously crunchy, vibrant, and/or sweet summer produce that she's been gorging on?
Is your answer that she decides to redo her kitchen (since she can't cook in it)?
You might be right...
Before:

After:

I'm about 3/4 finished, but we are headed out of town for the holiday weekend. Expect a post next week with more pictures of the finished product, and hopefully some cooking because I can't HANDLE any more blandness.
Friday, August 18, 2006
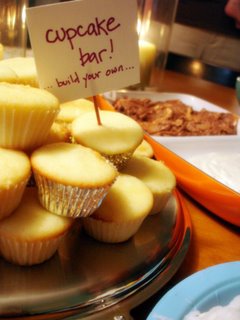
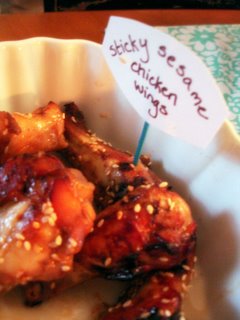
Happy Birthday, Chris
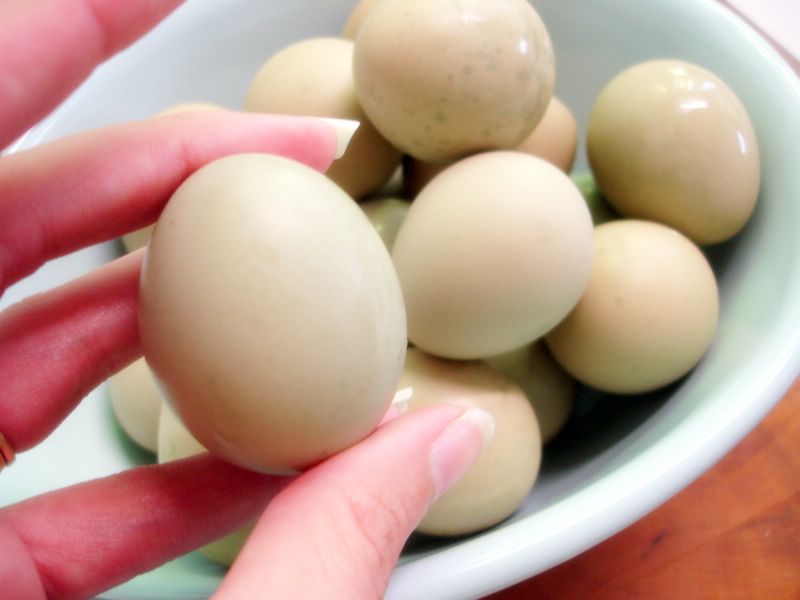
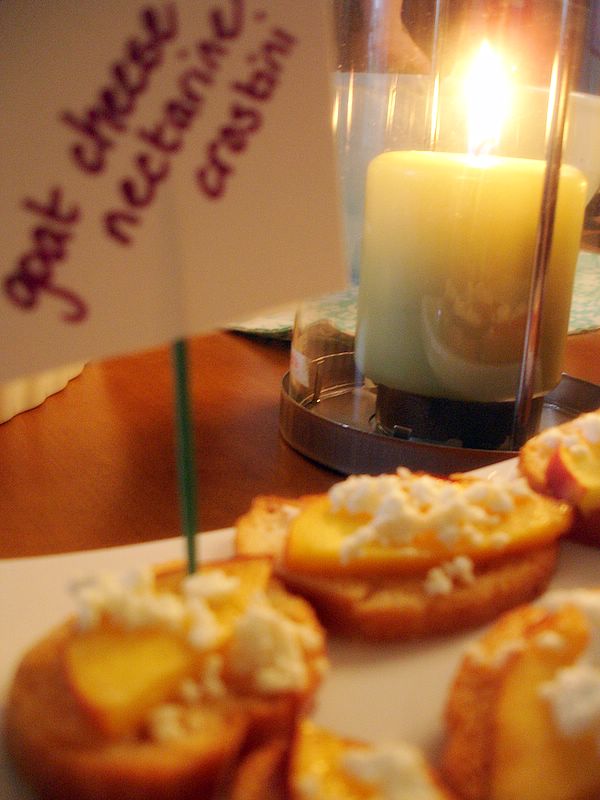
First, how gorgeous are pheasant eggs?
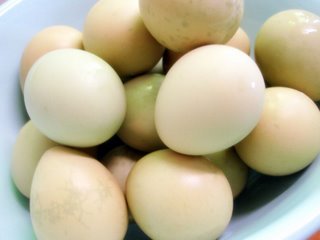
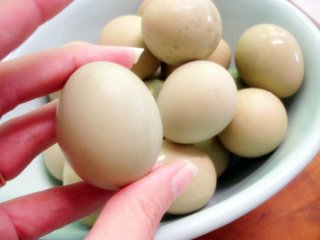
Last week I threw a little 32nd birthday party for my husband Chris. A good time was had by all and tons of food and drink was consumed, including enough sangria to go through 4 bottles of wine, a couple of cases of beer, and two different flavors of Italian buttercream.

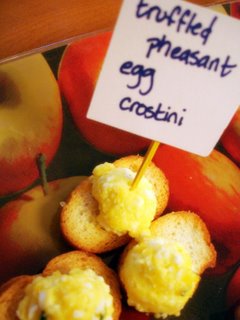
Happy birthday (again), Chris.
Monday, July 31, 2006
Roasted Zucchini Soup with Fried Shallots
You know what, Blogger? You and me? We are officially in a fight. You see, I've had people on my case for not posting enough, yet I've been trying to upload pictures for this recipe for DAYS. Days! This? Is ridiculous.
And so, with one triumphant picture loaded, I'm posting. This is a great soup that will use up any zucchinis that are taking over your garden or given to you by overburdened friends. It's best served at room temperature, but you can certainly chill it if the heat is beating you down. I like it at a thicker consistency than some of you might, just adjust the stock or half & half as you wish. Also, you'll see that the measurements are far from precise--just wing it and feel proud when you are later slurping down this savory sweet soup with its satisfyingly crunchy garnish.
Roasted Zucchini Soup with Fried Shallots
for the shallots:
3-4 shallots, peeled and sliced very thinly
peanut oil
Heat about an inch of peanut oil over medium-high heat in a small, heavy pot. Fry the shallots in batches, being careful to not overload the pot or they will stick, until a deep golden brown. Drain on paper towels.
For the soup:
4-5 medium zucchini
half & half
chicken stock (or any broth)
sea salt
freshly ground pepper
olive oil
Preheat oven to 450 degrees. Cube the zucchini roughly and toss generously in olive oil, salt, and pepper. Roast until caramelized on the edges and very soft--you want it softer than you would if eating it on its own.
Dump the zucchini into a food processor and pulse a few times until pretty mushy. Now you can get creative--add stock and continue processing until as smooth and thin as you like. Add some half & half (you could use cream or even whole milk instead) in at the end and pulse again to combine. Taste and adjust for seasoning--I like it simple, but you could add any number of spices at this point.
Ladle into a shallow bowl and top with a generous amount of the fried shallots. I recommend eating this whilst cursing your blog publishing program. It soothes the pain in a most satisfying manner.

Wednesday, July 12, 2006
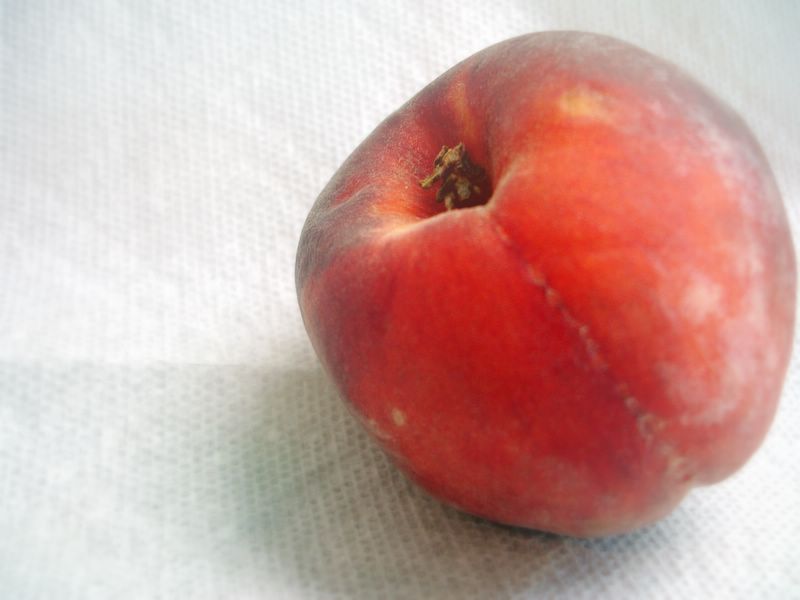
Simple Pleasures
I just made myself a heaping bowl of exceedingly sweet peaches, sliced thinly and drizzled with a tiny bit of fresh cream. The result is heavenly, like being given permission to eat peach ice cream for breakfast--but for me, even better (frozen peaches make my teeth hurt).

What's making you smile today?
What's making you smile today?
Monday, July 10, 2006
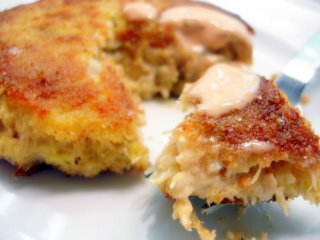
Single Girl Crabcakes
I am always inordinately proud when I make a real meal on nights when Chris is away, because really, isn't rice pudding and popcorn with lots of butter more appealing? I regret those nights of food debauchery every single time, though, and so I generally try to make something real.
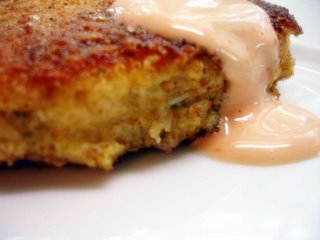
These crabcakes weren't perfect, in fact I'm not going to post a recipe until I get a chance to tweak it. However, they were warm, they used up some ingredients languishing in the refrigerator, and they were satisfying to my ravenous stomach. Topped with a quickie fake-remoulade and joined by a tangle of wilted lemon spinach, I had quite a nice little meal on my hands.
Other single night favorites include linguine with white clam sauce, BLEATs, Lemon Risotto, Tuna Burgers, and Couscous with Halloumi and Spinach. Before you start to think that Chris has abandoned me, these "single" nights only come along 3-4 times a month, when he has a show or practice or something like that.
Also, one last thing, you might notice, over there on the right, a new "email me" link. That's right, kids, she's slowly being drug into the 21st century and you can now email the old girl at marianne at theunemployedcook dot com.

These crabcakes weren't perfect, in fact I'm not going to post a recipe until I get a chance to tweak it. However, they were warm, they used up some ingredients languishing in the refrigerator, and they were satisfying to my ravenous stomach. Topped with a quickie fake-remoulade and joined by a tangle of wilted lemon spinach, I had quite a nice little meal on my hands.

Other single night favorites include linguine with white clam sauce, BLEATs, Lemon Risotto, Tuna Burgers, and Couscous with Halloumi and Spinach. Before you start to think that Chris has abandoned me, these "single" nights only come along 3-4 times a month, when he has a show or practice or something like that.
Also, one last thing, you might notice, over there on the right, a new "email me" link. That's right, kids, she's slowly being drug into the 21st century and you can now email the old girl at marianne at theunemployedcook dot com.
Tuesday, June 20, 2006
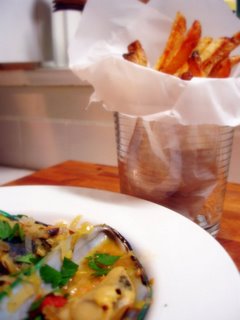
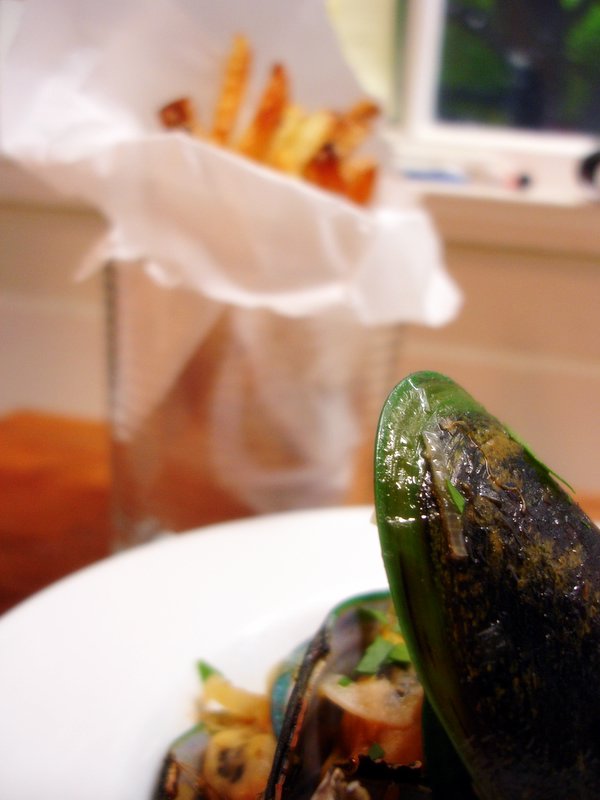
Moules Frites and Nostalgia
First off, thanks to the brilliant boy my youngest sister is dating, you can now find me at www.theunemployedcook.com, as well as through the blogger portal. This was done to make it easy for new readers directed from the magazine to find the site. Nifty, huh? Thanks a million to the ever helpful Kid Gravy (when are you going to come teach us about perfect biscuits?).

And now, on to the evening meal. I've been flipping through pictures from our honeymoon lately, trying to get my act together and have some printed out, but instead of productivity, this has inspired a wave of nostalgia. Chris and I visited Paris and Nice for two blissful weeks, doing nothing but eating, relaxing, and enjoying eachothers company. Being an ultimately food minded person, I couldn't help but think back to favorite meals we shared. Besides eating nearly our weight in duck (it's our favorite and harder to come by here), we ate lots of Moules Frites, gorgeous mussels cooked in a silky wine and garlic concoction, served with plenty of crispy frites to dip in the remaining sauce. Paired with a sweet-tart Lambic, it was pure heaven, I swear.
And so, after skimming over a recipe for mussels and fries in the latest Real Simple, I seriously couldn't stand it. I was going to need this dish in the near future, otherwise we were risking some sort of culinary wanderlust-inspired meltdown.
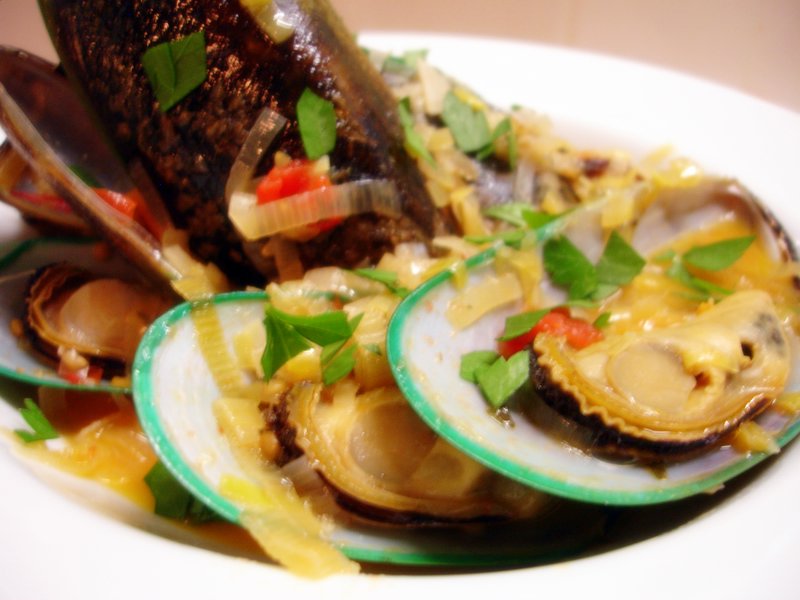
When I happened upon a large box of New Zealand Green Mussels in my grocer's freezer, I knew that it must be fate. Let me tell you right off the bat, I know frozen is no way to have a mussel, but you have to grant the poor landlocked mountain girl a few concessions, lest she cry all over you and ruin your nice new shirt. Okay? Okay. Also worth a mention, these mussels were enormous, and their shells were the most incredible green color, I couldn't help but marvel at them.
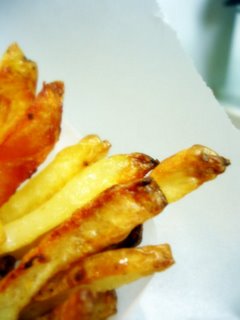
This recipe is terrifically simple, with only a time investment (for the frites), and a bit of mind-numbing chopping. The end result, however, will transport you and have you making swoony faces in the direction of the one you love.
Moules Frites
with thanks to Real Simple Magazine
serves 2-3
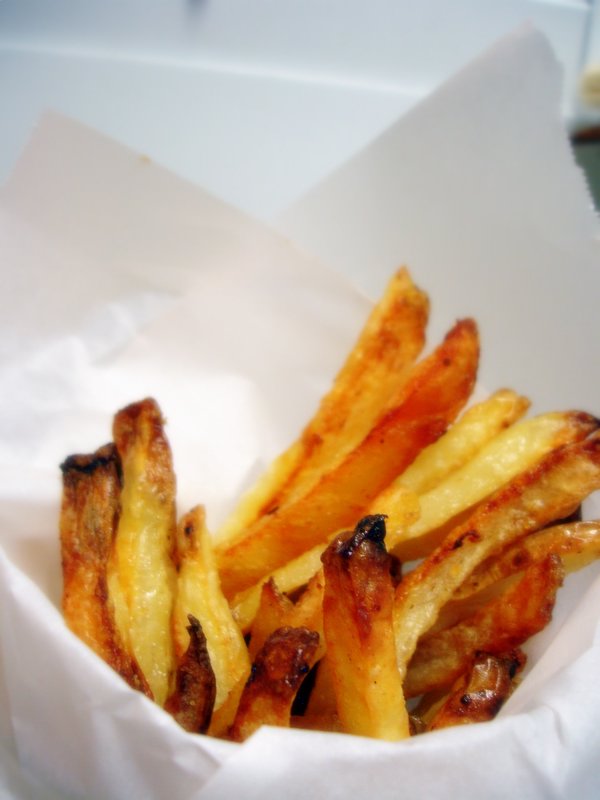
for the oven-fried frites:
2 large white new potatoes
3 Tbsp butter
splash olive oil
sea salt
freshly ground pepper
Preheat oven to 425 degrees. Toss butter in a large glass baking dish, drizzle a bit of oil over it, and chuck it into the heating oven. While the butter melts, slice your potatoes into french-fry sized pieces (the thicker you go, the longer they will take to crisp up, so go thinner). Once the butter has melted completely, remove the pan from the oven and swirl the oil around to coat completely. Sprinkle the hot oil generously with salt and pepper, then add the potato, toss very well to coat.
Return pan to oven. Cook until crispy and golden brown, about 45-60 minutes. Gently toss once during cooking (gently is key, the potatoes will be soft and might want to fall apart). Once the fries are about 20 minutes away from completion, begin the mussels.

for the mussels:
4 Tbsp butter
1 Tbsp olive oil
3 cloves garlic, slivered
1 large leek, halved and sliced into half-moons
1.5 cups dry rose*
10 cherry tomatoes, diced roughly
handful fresh flat-leaf parsley, roughly chopped
2 pounds mussels, scrubbed and debearded if they don't come that way
sea salt
freshly ground black pepper
*any dry white wine is fine, but I love the sunset-colored broth the rose leaves you with.
Melt the butter and oil in a large pot over medium-low heat. Once melted, add garlic and leek and sweat until very tender, but not browning, around 6-8 minutes. Add the wine and simmer for 5 minutes. Toss in tomatoes and half of the parsley (reserve the rest for garnish), as well as a scant teaspoon salt and fat pinch or two of pepper. Turn heat up to medium and bring to a low boil. Simmer for 2-3 minutes, then taste to check seasoning.

Toss mussels in the fragrant broth and clamp a lid on. Cook until mussels open, 3-4 minutes (discard any mussels that do not open). Divide mussels into shallow bowls and ladle generous portions of the gorgeous broth over them, topping with a sprinkle of the remaining parsley. Serve with lots of crispy, salty frites and a simple green salad alongside.

Sitting here, after happily devouring my delicious dinner, sipping a cassis lambic bought for this sort of occasion, I realize this is a rare moment of pure contentedness. All too often my bouts of nostalgia mire me in melancholy, but it seems that recreating this oh-so-French/Belgian meal has instead sent me soaring on the back of happy memories.

And now, on to the evening meal. I've been flipping through pictures from our honeymoon lately, trying to get my act together and have some printed out, but instead of productivity, this has inspired a wave of nostalgia. Chris and I visited Paris and Nice for two blissful weeks, doing nothing but eating, relaxing, and enjoying eachothers company. Being an ultimately food minded person, I couldn't help but think back to favorite meals we shared. Besides eating nearly our weight in duck (it's our favorite and harder to come by here), we ate lots of Moules Frites, gorgeous mussels cooked in a silky wine and garlic concoction, served with plenty of crispy frites to dip in the remaining sauce. Paired with a sweet-tart Lambic, it was pure heaven, I swear.

And so, after skimming over a recipe for mussels and fries in the latest Real Simple, I seriously couldn't stand it. I was going to need this dish in the near future, otherwise we were risking some sort of culinary wanderlust-inspired meltdown.
When I happened upon a large box of New Zealand Green Mussels in my grocer's freezer, I knew that it must be fate. Let me tell you right off the bat, I know frozen is no way to have a mussel, but you have to grant the poor landlocked mountain girl a few concessions, lest she cry all over you and ruin your nice new shirt. Okay? Okay. Also worth a mention, these mussels were enormous, and their shells were the most incredible green color, I couldn't help but marvel at them.

This recipe is terrifically simple, with only a time investment (for the frites), and a bit of mind-numbing chopping. The end result, however, will transport you and have you making swoony faces in the direction of the one you love.
Moules Frites
with thanks to Real Simple Magazine
serves 2-3
for the oven-fried frites:
2 large white new potatoes
3 Tbsp butter
splash olive oil
sea salt
freshly ground pepper
Preheat oven to 425 degrees. Toss butter in a large glass baking dish, drizzle a bit of oil over it, and chuck it into the heating oven. While the butter melts, slice your potatoes into french-fry sized pieces (the thicker you go, the longer they will take to crisp up, so go thinner). Once the butter has melted completely, remove the pan from the oven and swirl the oil around to coat completely. Sprinkle the hot oil generously with salt and pepper, then add the potato, toss very well to coat.
Return pan to oven. Cook until crispy and golden brown, about 45-60 minutes. Gently toss once during cooking (gently is key, the potatoes will be soft and might want to fall apart). Once the fries are about 20 minutes away from completion, begin the mussels.
for the mussels:
4 Tbsp butter
1 Tbsp olive oil
3 cloves garlic, slivered
1 large leek, halved and sliced into half-moons
1.5 cups dry rose*
10 cherry tomatoes, diced roughly
handful fresh flat-leaf parsley, roughly chopped
2 pounds mussels, scrubbed and debearded if they don't come that way
sea salt
freshly ground black pepper
*any dry white wine is fine, but I love the sunset-colored broth the rose leaves you with.
Melt the butter and oil in a large pot over medium-low heat. Once melted, add garlic and leek and sweat until very tender, but not browning, around 6-8 minutes. Add the wine and simmer for 5 minutes. Toss in tomatoes and half of the parsley (reserve the rest for garnish), as well as a scant teaspoon salt and fat pinch or two of pepper. Turn heat up to medium and bring to a low boil. Simmer for 2-3 minutes, then taste to check seasoning.
Toss mussels in the fragrant broth and clamp a lid on. Cook until mussels open, 3-4 minutes (discard any mussels that do not open). Divide mussels into shallow bowls and ladle generous portions of the gorgeous broth over them, topping with a sprinkle of the remaining parsley. Serve with lots of crispy, salty frites and a simple green salad alongside.
Sitting here, after happily devouring my delicious dinner, sipping a cassis lambic bought for this sort of occasion, I realize this is a rare moment of pure contentedness. All too often my bouts of nostalgia mire me in melancholy, but it seems that recreating this oh-so-French/Belgian meal has instead sent me soaring on the back of happy memories.
Curiouser and curiouser.
Who is this mysterious anonymous commenter that cannot rest until I post the recipe for butter-poached lobster tails? This person, who leaves no distinguishing details about themselves, but comments again and again, like I am purposely punishing them?
I assure you, I meant you no harm.
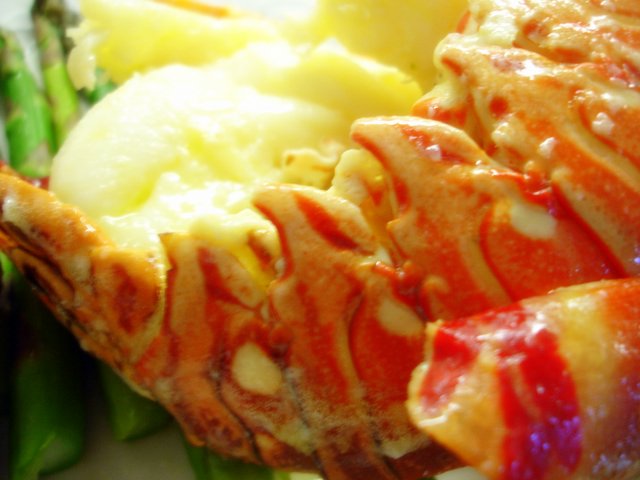
You will be disappointed to find, however, that the recipe is ridiculously simple, and not too precise. I started by purchasing 3 enormous 10-ounce fresh Caribbean lobster tails at the fish market. Using a heavy, sharp knife, I split the tails down the middle and trimmed off their little flippers.
While I prepared the tails, I melted a pound and a half of salted butter in a large saucepan over medium-low heat. You want the butter to be melted, but not at a temperature that will fry the meat. If the lobster sizzles when you place it in the pan, the butter is too hot, remove from heat and adjust.
Cook, cut side down, until opaque, then flip over and cook another 10 minutes or so. The lovely things about this method is that the butter makes it much harder to overcook the tender meat. Serve to your guests and watch them gaze at you with a new sense of wonderment.
And please, mysterious commenter, leave yet another comment and let me know how this goes for you? It's really very easy.
I assure you, I meant you no harm.
You will be disappointed to find, however, that the recipe is ridiculously simple, and not too precise. I started by purchasing 3 enormous 10-ounce fresh Caribbean lobster tails at the fish market. Using a heavy, sharp knife, I split the tails down the middle and trimmed off their little flippers.
While I prepared the tails, I melted a pound and a half of salted butter in a large saucepan over medium-low heat. You want the butter to be melted, but not at a temperature that will fry the meat. If the lobster sizzles when you place it in the pan, the butter is too hot, remove from heat and adjust.
Cook, cut side down, until opaque, then flip over and cook another 10 minutes or so. The lovely things about this method is that the butter makes it much harder to overcook the tender meat. Serve to your guests and watch them gaze at you with a new sense of wonderment.
And please, mysterious commenter, leave yet another comment and let me know how this goes for you? It's really very easy.
Thursday, June 15, 2006
Homemade Buns and Other News...

A few days ago I was smart enough to take a crack at Kevin's recipe for Black Pepper & Garlic Buns, and my, am I ever glad I did. I made minimal substitutions, namely using only white flour (I didn't have any whole wheat, and I'm lazy), white pepper (same), and shaping them into hoagie-style buns.
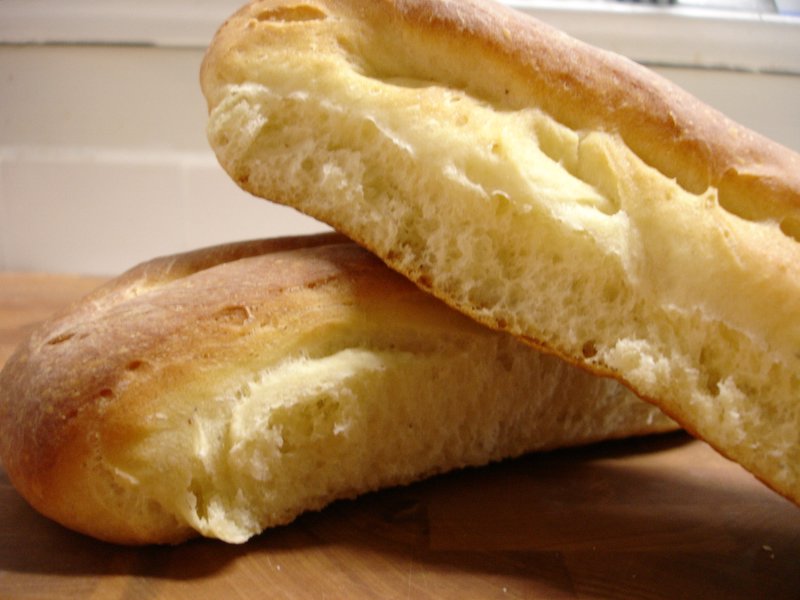

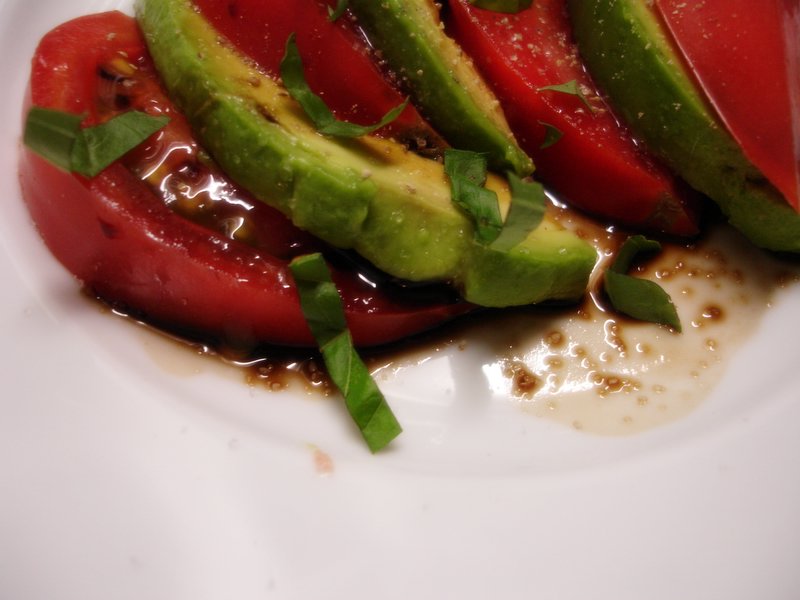
We had these with some fresh Italian sausages picked up at the Farmer's Market, sweet corn on the cob, and a nice avocado and tomato salad.

In other news, one of the projects I've been working on has come to fruition--I will now being doing restaurant reviews (and other food-related writing) for Knoxville's Cityview Magazine. They are revamping their website at the moment, but once it is up and running I will link to monthly reviews and other tidbits. Needless to say, I am pretty excited about this opportunity and can't believe I get paid to do this.
Locals, look for my review of new restaurant La Costa in the July issue, on newsstands at the end of June.
Monday, June 05, 2006
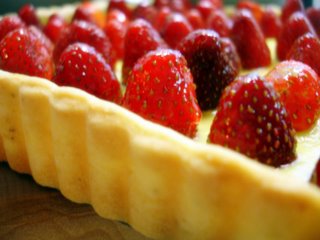
Mixed Berry Tarts (and no excuses)
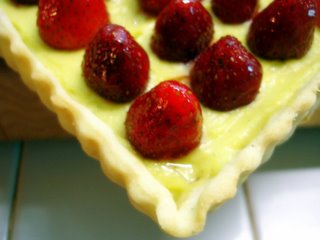
I'm just going to avert my eyes and jump right into the recipe, because I can't handle your accusing stares right now. I'm sorry! But I'm not here to make excuses. Look, shiny pretty tart:
Now, since I wrote last I have finally acquired a food processor, and my life in the kitchen has honestly changed. I used it twice the day I bought it, and have used it multiple times a week since then. The best thing about it, so far, is the improvement my pie crusts have seen. People, I have made the perfect pie crust. And lo, it is good.

Along with the fancy food processor I picked up an adorable square tart pan and some exceedingly good vanilla beans. The tart pan inspired some sort of tart mania that has resulted in some very rich creations, and what appears to be a budding pot belly. I've had to take up swimming just to counter the Tart Problem.
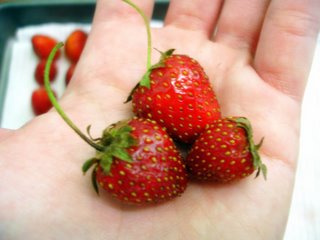
The whole reason I was inspired to get on this tart kick was because of these tiny strawberries. I defy anyone that likes strawberries to not freak out a little upon seeing these fingernail-sized specimens. I made my first stab at pastry cream (good, but too thick and gummy in texture), and attempted a pie crust idea that lived in my wee noggin. The crust was fine, it wasn't exactly tender and tasted more like cornbread than I preferred, but it was serviceable and didn't reduce me to tears. Altogether the tart was well received and eaten in approximately 11 minutes by our friends.
But I was not satisfied!
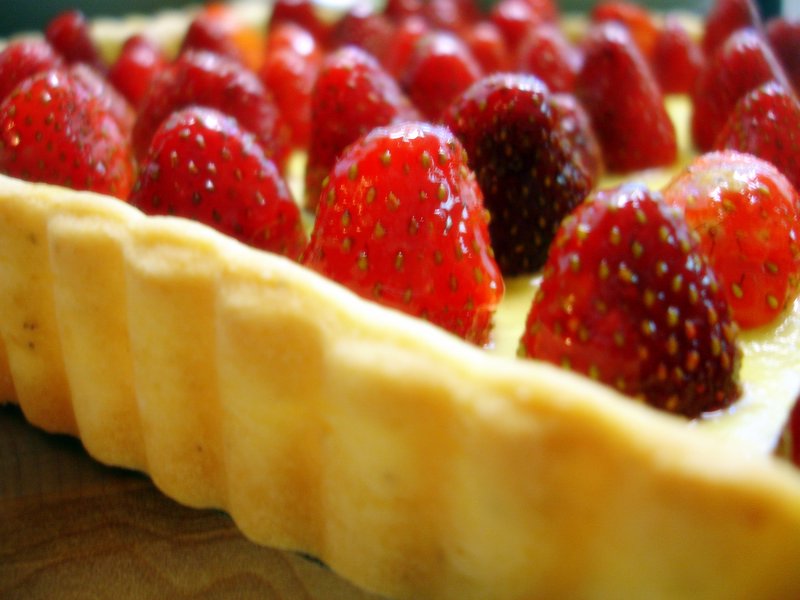
And so, I tried again. This time, I took the pie crust idea in my head and merged it with a recipe from this month's issue of Fine Cooking. The result was magnificent--flaky and crisp with this almost buttermilk flavor that made me swoon. The pastry cream was perfect, too--firm enough to hold up to slicing, but delightfully rich and oozy (and boozy, for that matter). I am still perfecting the measurements for my ground breaking "less fat" chocolate ganache, so you can either use your own recipe or skip it all together. You really can't go wrong.
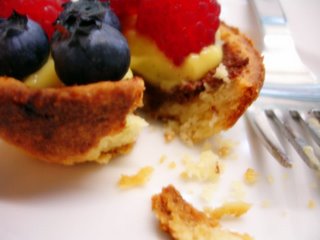
When I test out a new recipe on people (the first at a Memorial Day party, the second at a gathering of Knoxville food bloggers), I always make some miniatures so that I can test things and make sure they are not poison. For these sweet babies I cut out circles of dough with a large drinking glass and carefully lined a muffin tin with them. To weigh down the crust, you can use a muffin liner and pie weights (I use rice) to good effect. You can make this gorgeous tart with any combination of seasonal berries.

Mixed Berry Tart
with thanks to Fine Cooking magazine
for the crust:
1.75 cups all-purpose flour
2 Tbsp cornmeal
12 Tbsp chilled butter, cut into chunks
1 egg, beaten
2 Tbsp sugar
1 Tbsp milk
2 tsp lemon juice
pinch salt (if you use salted butter, do not add salt)
In a food processor, combine all ingredients and pulse until the dough has begun to form big clumps (you want to go past the pea sized clumps and really incorporate the dough). Roll out a large piece of cling wrap and carefully dump the dough out onto it--the dough will seem a little loose and dry. Using your hands, press the dough into a compact patty and chill for 15 minutes.
After removing the dough from the refrigerator, let it sit for a few minutes. You want the dough to be cool, but not so cold that it cracks when you try to roll it out. Roll out to your desired thickness and shape, and place in a tart pan.
Preheat oven to 400 degrees. Using a fork, poke some holes in the bottom of the pie crust. Carefully line the crust with aluminum foil or parchment paper, and fill with pie weights (or dried beans or rice). Bake for roughly 25 minutes, until the edges are a deep golden brown. Remove from oven and let cool on a metal rack. Be careful when removing the pie weights, they can get pretty hot.

for the rum-vanilla pastry cream:
1.25 cups milk (I use 1%)
half of a vanilla bean, split down the middle
3 large egg yolks
.25 cups sugar
3 Tbsp flour
2 scant Tbsp cornstarch
1 Tbsp spiced rum (or liqueur of your choice)
Place milk and vanilla bean in a medium saucepan and bring to a low boil. While the milk is heat, whisk together the egg yolks and sugar, then add the flour and cornstarch. This mixture will be pretty thick. Once milk has reached a boil, remove from heat and remove vanilla bean. Scrape vanilla seeds out and add to egg mixture (you can use the dried vanilla pod to make vanilla sugar). Slowly temper the egg mixture by whisking in the hot milk, a few spoonfuls at a time.

Once the milk is mixed into the egg mixture, pour back into the saucepan. Cook over medium heat, whisking constantly, until the mixture comes to a boil. It will thicken very quickly, so keep an eye on it and keep whisking. Once the mixture has thickened to a pudding-like consistency, remove from heat and whisk in your liqueur (the liqueur is optional, of course). Pour into a bowl and press cling wrap down on the cream to prevent a skin from forming. Let cool completely.
To assemble tart, spread a layer of chocolate ganache on the tart crust, if you are so inclined. Like I said up top, I'm still working out the measurements for my magical less-fat ganache, so I didn't include the recipe. The tart is certainly still delicious without it.
After the ganache, carefully spread the cooled pastry cream on the tart. Top with any fresh berries you can get your hands on, and serve to your adoring guests. If you want to be extra fancy, you can brush a little melted apricot jelly over the fruit to make it look all shiny and professional.
This one's worth every second of work, folks.
Now, since I wrote last I have finally acquired a food processor, and my life in the kitchen has honestly changed. I used it twice the day I bought it, and have used it multiple times a week since then. The best thing about it, so far, is the improvement my pie crusts have seen. People, I have made the perfect pie crust. And lo, it is good.

Along with the fancy food processor I picked up an adorable square tart pan and some exceedingly good vanilla beans. The tart pan inspired some sort of tart mania that has resulted in some very rich creations, and what appears to be a budding pot belly. I've had to take up swimming just to counter the Tart Problem.

The whole reason I was inspired to get on this tart kick was because of these tiny strawberries. I defy anyone that likes strawberries to not freak out a little upon seeing these fingernail-sized specimens. I made my first stab at pastry cream (good, but too thick and gummy in texture), and attempted a pie crust idea that lived in my wee noggin. The crust was fine, it wasn't exactly tender and tasted more like cornbread than I preferred, but it was serviceable and didn't reduce me to tears. Altogether the tart was well received and eaten in approximately 11 minutes by our friends.

But I was not satisfied!
And so, I tried again. This time, I took the pie crust idea in my head and merged it with a recipe from this month's issue of Fine Cooking. The result was magnificent--flaky and crisp with this almost buttermilk flavor that made me swoon. The pastry cream was perfect, too--firm enough to hold up to slicing, but delightfully rich and oozy (and boozy, for that matter). I am still perfecting the measurements for my ground breaking "less fat" chocolate ganache, so you can either use your own recipe or skip it all together. You really can't go wrong.
When I test out a new recipe on people (the first at a Memorial Day party, the second at a gathering of Knoxville food bloggers), I always make some miniatures so that I can test things and make sure they are not poison. For these sweet babies I cut out circles of dough with a large drinking glass and carefully lined a muffin tin with them. To weigh down the crust, you can use a muffin liner and pie weights (I use rice) to good effect. You can make this gorgeous tart with any combination of seasonal berries.

Mixed Berry Tart
with thanks to Fine Cooking magazine
for the crust:
1.75 cups all-purpose flour
2 Tbsp cornmeal
12 Tbsp chilled butter, cut into chunks
1 egg, beaten
2 Tbsp sugar
1 Tbsp milk
2 tsp lemon juice
pinch salt (if you use salted butter, do not add salt)
In a food processor, combine all ingredients and pulse until the dough has begun to form big clumps (you want to go past the pea sized clumps and really incorporate the dough). Roll out a large piece of cling wrap and carefully dump the dough out onto it--the dough will seem a little loose and dry. Using your hands, press the dough into a compact patty and chill for 15 minutes.
After removing the dough from the refrigerator, let it sit for a few minutes. You want the dough to be cool, but not so cold that it cracks when you try to roll it out. Roll out to your desired thickness and shape, and place in a tart pan.
Preheat oven to 400 degrees. Using a fork, poke some holes in the bottom of the pie crust. Carefully line the crust with aluminum foil or parchment paper, and fill with pie weights (or dried beans or rice). Bake for roughly 25 minutes, until the edges are a deep golden brown. Remove from oven and let cool on a metal rack. Be careful when removing the pie weights, they can get pretty hot.

for the rum-vanilla pastry cream:
1.25 cups milk (I use 1%)
half of a vanilla bean, split down the middle
3 large egg yolks
.25 cups sugar
3 Tbsp flour
2 scant Tbsp cornstarch
1 Tbsp spiced rum (or liqueur of your choice)
Place milk and vanilla bean in a medium saucepan and bring to a low boil. While the milk is heat, whisk together the egg yolks and sugar, then add the flour and cornstarch. This mixture will be pretty thick. Once milk has reached a boil, remove from heat and remove vanilla bean. Scrape vanilla seeds out and add to egg mixture (you can use the dried vanilla pod to make vanilla sugar). Slowly temper the egg mixture by whisking in the hot milk, a few spoonfuls at a time.

Once the milk is mixed into the egg mixture, pour back into the saucepan. Cook over medium heat, whisking constantly, until the mixture comes to a boil. It will thicken very quickly, so keep an eye on it and keep whisking. Once the mixture has thickened to a pudding-like consistency, remove from heat and whisk in your liqueur (the liqueur is optional, of course). Pour into a bowl and press cling wrap down on the cream to prevent a skin from forming. Let cool completely.
To assemble tart, spread a layer of chocolate ganache on the tart crust, if you are so inclined. Like I said up top, I'm still working out the measurements for my magical less-fat ganache, so I didn't include the recipe. The tart is certainly still delicious without it.

After the ganache, carefully spread the cooled pastry cream on the tart. Top with any fresh berries you can get your hands on, and serve to your adoring guests. If you want to be extra fancy, you can brush a little melted apricot jelly over the fruit to make it look all shiny and professional.
This one's worth every second of work, folks.
Thursday, May 18, 2006
I'm on vacation this week...
...but I'm still cooking! Butter poached lobster tails, anyone?


I'll be back next week with vacation tales and birthday adventures!


I'll be back next week with vacation tales and birthday adventures!
Tuesday, May 09, 2006
Asparagus Souffle
Fellow Knoxville food blogger Kevin has been working on a project after my own heart, because it extolls the virtues of one of my most favorite vegetables. Every Monday you can find a round up of the most sublime asparagus recipes at Kevin's Asparagus Aspirations, and after days and days of wracking my brain for the perfect entry, I came up with this puffy wonder.

This souffle was a very proud achievement because I worked off of no pre-existing recipe, a daunting task when dealing with finicky egg whites. Armed with my vague knowledge of ingredient proportions and some extremely fresh spring asparagus, I set to work.
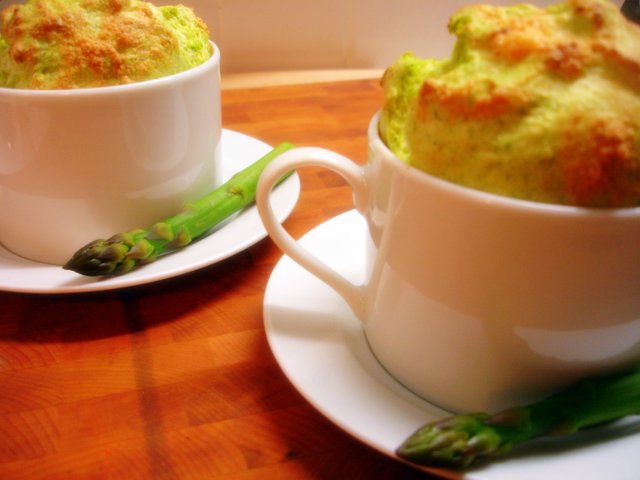
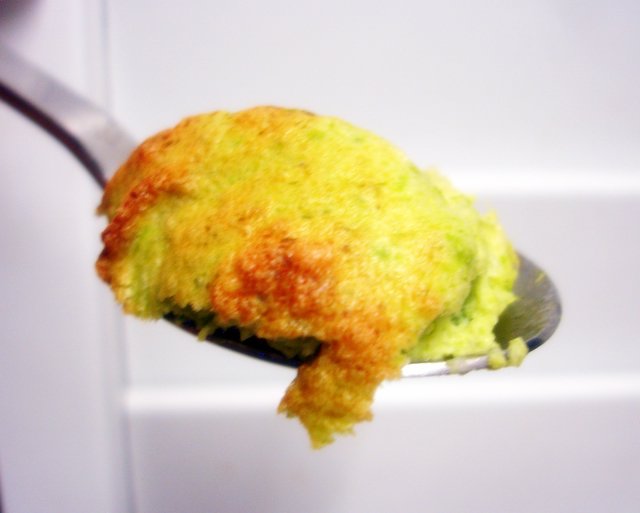
The results were better than I had dreamed. I managed to maintain the bright green color (that was my first concern, that I would end up with muddy greenish-brown puffs), and each bite truly tasted of asparagus first. The additional ingredients simply served as the supporting cast for this impressive dish. And, should you worry that you are wasting half of your asparagus stalks, I refer you to this recipe for a cold asparagus soup that makes excellent use of the woody stalks.
While I made two larger souffles, I think this would make a lovely first course for four people, served in demitasse cups or small ramekins. Feel free to try different cheeses--I think chevre or Gruyere would be quite nice as well. And of course, if you prefer perfect, flat-topped souffles, knock yourself out and smooth the surface evenly. I like the pillowy, free form mounds, myself.

Asparagus Souffle
serves 2-4
3 large eggs, separated
1 lb. asparagus
2-3 Tbsp vegetable or chicken stock
sea salt
freshly ground pepper
.25 tsp Dijon mustard
2 Tbsp freshly grated Parmesan
3 Tbsp all-purpose flour
Preheat oven to 350 degrees. Cut the asparagus stalks in half, for this recipe you only need the most tender green ends. Boil the asparagus in lightly salted water until just tender--about 3 minutes. Drain and let cool. Chop the blanched spears roughly and toss into a blender or food processor. Add a pinch of salt and pepper, and some of the stock and pulse until smooth. You may need a dash or two more of stock, you want a very smooth green puree. Set aside.

In a mixing bowl, cream the egg yolks, flour, mustard, Parmesan, and asparagus puree until well combined--about 3 minutes. With the bowl sitting over a pan of simmering water, whisk until paler in color and quite thick, roughly 5 minutes. Replace on mixer stand, and cream for an additional 3 minutes, until light and beginning to cool. Transfer to a clean bowl and set aside. At this point you can wait up to 2 hours before completing the souffles.
In a clean mixing bowl, whip the egg whites until they hold a stiff peaks. Be careful to not over beat the whites. Whisk one third of the egg whites into the asparagus mixture until well combined, then carefully fold in the remaining egg whites. Scoop the souffle mixture into ramekins or tea cups, leaving about.5 inch at the top, and making sure to not deflate the fluffy mixture.

Place ramekins onto a baking sheet and bake until puffy and golden brown, 10-12 minutes. Garnish with an asparagus spear (if desired) and serve immediately.
This souffle was a very proud achievement because I worked off of no pre-existing recipe, a daunting task when dealing with finicky egg whites. Armed with my vague knowledge of ingredient proportions and some extremely fresh spring asparagus, I set to work.
The results were better than I had dreamed. I managed to maintain the bright green color (that was my first concern, that I would end up with muddy greenish-brown puffs), and each bite truly tasted of asparagus first. The additional ingredients simply served as the supporting cast for this impressive dish. And, should you worry that you are wasting half of your asparagus stalks, I refer you to this recipe for a cold asparagus soup that makes excellent use of the woody stalks.
While I made two larger souffles, I think this would make a lovely first course for four people, served in demitasse cups or small ramekins. Feel free to try different cheeses--I think chevre or Gruyere would be quite nice as well. And of course, if you prefer perfect, flat-topped souffles, knock yourself out and smooth the surface evenly. I like the pillowy, free form mounds, myself.
Asparagus Souffle
serves 2-4
3 large eggs, separated
1 lb. asparagus
2-3 Tbsp vegetable or chicken stock
sea salt
freshly ground pepper
.25 tsp Dijon mustard
2 Tbsp freshly grated Parmesan
3 Tbsp all-purpose flour
Preheat oven to 350 degrees. Cut the asparagus stalks in half, for this recipe you only need the most tender green ends. Boil the asparagus in lightly salted water until just tender--about 3 minutes. Drain and let cool. Chop the blanched spears roughly and toss into a blender or food processor. Add a pinch of salt and pepper, and some of the stock and pulse until smooth. You may need a dash or two more of stock, you want a very smooth green puree. Set aside.

In a mixing bowl, cream the egg yolks, flour, mustard, Parmesan, and asparagus puree until well combined--about 3 minutes. With the bowl sitting over a pan of simmering water, whisk until paler in color and quite thick, roughly 5 minutes. Replace on mixer stand, and cream for an additional 3 minutes, until light and beginning to cool. Transfer to a clean bowl and set aside. At this point you can wait up to 2 hours before completing the souffles.
In a clean mixing bowl, whip the egg whites until they hold a stiff peaks. Be careful to not over beat the whites. Whisk one third of the egg whites into the asparagus mixture until well combined, then carefully fold in the remaining egg whites. Scoop the souffle mixture into ramekins or tea cups, leaving about.5 inch at the top, and making sure to not deflate the fluffy mixture.

Place ramekins onto a baking sheet and bake until puffy and golden brown, 10-12 minutes. Garnish with an asparagus spear (if desired) and serve immediately.
Subscribe to:
Posts (Atom)