Oh, dear. I was hoping I could keep this from going public, but the revelation seems to be inevitable: I have a Problem. To be specific, I have a Crepe Problem. I used to be able to keep this in line by living so very far away from France, so far the only real source for my addiction. But something very bad has happened. I found a recipe. And even worse, I seem to be not-so-bad at making the little devils.
I started out using a wonderful Calphalon non-stick griddle that was a wedding gift. The non-stickiness of it made the flipping and whatnot a breeze, but the wide open squareness of the surface made for some very wobbly, ugly crepes. However, due to my Problem, I took no umbrance with wolfing these hideous reject crepes down as soon as they slid off the griddle. When I fist got started, all I wanted was butter and sugar crepes (beurre et sucre if you want to order from the source). The Mr. quickly took me to the dark side, suggesting bittersweet chocolate, then chocolate and banana. If you've never had a hot, fresh crepe dripping with silky chocolate, well...you probably shouldn't or you will end up like me. And it is a sad state, indeed.
I never knew crepes were so simple! Well, that's not true, I knew the recipe was simple, but I never dreamed they were the kind of things I could turn out within an hour whenever the craving hit me.
Last weekend, Mr. Canada and I happily spent some wedding store credit and a generous gift card at a local department store and Williams-Sonoma, respectively. One of the things we picked up (and honestly one of the last things I felt the kitchen tool kit was lacking), was an 8" nonstick omelette pan. Little did I know, this teeny little pan was only going to fuel my Problem. Tonight, after a lovely dinner with my father, sister, and her boyfriend (the gift certificate dinner was waylaid by Mr. C's late night of work), I came home with that dangerous look in my eye. "Crepes," I thought. That was literally all that I thought. Sad, isn't it?
I whipped up the batter first off, because it needs to sit for at least 40 minutes to allow the ingredients to meld completely. While I was (patiently, I promise) waiting, I was thinking about my plan of attack. Would I use the griddle, which made delicious crepes that were decidedly not round, or...I wonder if the wee omelette pan would work? Since you really shouldn't machine wash nonstick pans, I decided having a smaller pan to wash was enough of a reason to try it out.
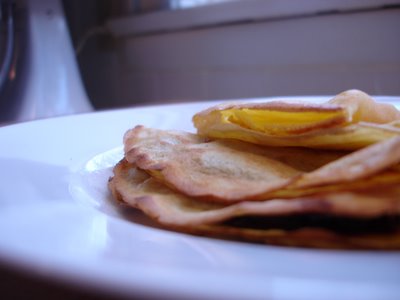
And, oh it worked so well. For the first time, I was making the prettiest, tastiest, ROUND crepes that had ever left my kitchen. Maybe it was one too many glasses of wine, maybe it was hormones, but it nearly brought a tear to my eye. Nearly, I said nearly. Let's not get overemotional here.
So, I pass on to you, with this story of personal triumph, the crepe recipe that I have found best for me. There are a million recipes out there with less egg, more flour, more butter, whatever, but this is perfect for my obsessive palate.
Basic Crepe Recipe
makes 14-16 small crepes
4 eggs
1 cup flour
1/2 cup milk
1/2 cup water
1/2 tsp salt
2 Tbsp. melted butter
Dump all of the ingredients into a blender and mix for 30 seconds. Scrape down the sides and mix for 15 seconds more. Cover and let sit for 40 minutes to an hour.
Pulse once more before cooking the crepes up. Heat an 8 inch nonstick omelette pan over medium heat (or an omelette pan if you're high falutin", but then why are you reading my recipe?).
Hold the pan up off the heat with your left hand. With your right hand, take a 1/4 cup measuring cup, and dip out about that much batter and pour into the warm pan. Before putting the pan back onto the heat, swirl it around until it coats the base of the pan evenly, and only creeps up the sides a bit. Place the pan back on the burner. After about a minute (I know this isn't precise, but all stoves and pans are different), use the edge of a knife or a thin plastic spatula to lift one edge. Using your fingers and the knife/spatula, flip the crepe over to the other side. They aren't as delicate as they seem, so try to not stress over tearing it up. Also, as a warning, your first crepe (like the first pancake you make), may not be all that hot. If it isn't, it is a nice thing to munch on while you make the pretty ones.
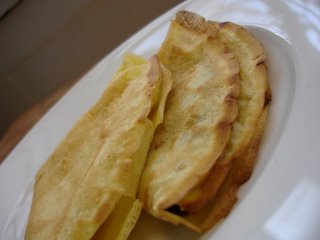
Once you flip the crepe over, you've got a choice in course of action. One course is to cook the other side and then slide the crepes into a tidy little pile*. Or, once you have flipped to the other side, you can go ahead and fill the little suckers. There are a lot of options for fillings, you can really go wild here, but I'll give a few basic examples of savory and sweet:
Sweet Fillings:butter and sugar (spread the butter around until melted, sprinkle sugar over)
butter and jam
chocolate—dark or milk, just make it good quality
chocolate and sliced banana
chocolate and jam (today I had dark chocolate with homemade tart plum jam)
Nutella (chocolate and hazelnut spread from the gods--if you haven't tried it, do, but don't yell at me after you eat the whole jar)
Savory Fillings:Guyere (or almost any cheese, really, but Gruyere is wonderful)
Cheese with tomatoes and cracked pepper
Cheese with tomatoes and parma ham (or rotisserie chicken)
Wild mushrooms, herbs, and a drizzle of cream
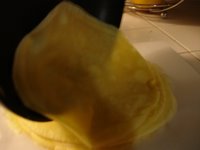
Once the crepe is filled to your liking, you just need to fold it up and serve it to your soon-to-be adoring fans (or to yourself, your own biggest fan). There are three basic ways that I fold crepes, so if you are looking for swans or other forms of origami, you’ve got the wrong very-amateur-cooking blog.
The first, and the one I use for the most simply filled crepes (butter and sugar, just cheese, etc.) is also the most complicated. Luckily, it’s still ridiculously easy. Fold the crepe in half, using your fingers or your flexible plastic spatula, then fold in half again. You now have a nice, accidentally pretty, little crepe on your hands.
Another way of folding is even more simple—just fold the crepe in half. I find that this is nice for anything with a chunkier filling—chocolate and banana for example.
Lastly, you can just roll that baby up like a fat cigar. While this is a traditional way of serving some crepe dishes, I really don’t use it much. I like the distribution of flavors and textures you get with the other methods.
Martha Stewart recently made a cake out of layers and layers of crepes with hazelnut cream in between that nearly made me weep. It gave me an idea for a confection this summer, maybe with raspberry jam layers and a lemon glaze poured over, swirled with a little dark chocolate for good measure? I need to be stopped.
Okay, all you ever wanted to know, and a lot you didn’t, about one of my favorite things in the world. Crepes are impressive, but so simple, and they freeze really well. *If you want to freeze them, stack them up with parchment or wax paper in between each crepe, and stash away in a large freezer bag once the crepes have cooled. Just heat them up in a pan, where you can go directly to the filling. Eat them within a couple of weeks, but I’d be surprised if they make it more than a few days. Enjoy!
Mrs. C.

 balance of sweet, tangy, and savory.
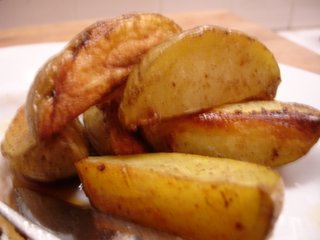 This pork is very good with a side of crispy roasted potatoes. I make my potatoes like this: put a chunk of butter and a glug of olive oil in a ceramic or glass baking pan, and put the pan in the oven as it preheats to 400 degrees. While the butter is melting and the pan is getting hot, quarter some smallish Yukon Gold potatoes. When the butter is melted, take the pan out and swirl the fat around to coat the bottom. Sprinkle the oil with sea salt and pepper, then tip the potato slices in. Give a good stir to coat the potatoes, then roast for at least 45 minutes. You want them to be really good and brown and crispy in the end.