If tempted by the food at Dancing Bear Lodge, he might.
Originally printed in the April issue of Cityview Magazine.
This is a busy time of year—spring has sprung in all of its glory and suddenly your weekends are starting to fill up in anticipation of summers festive warmth. As you get busier and busier, don’t you wish you had a moment to get away for awhile? A chance to get out of the city and unwind in a completely different atmosphere?
In these instances, we are particularly lucky in Knoxville. Within an hour you can find a bevy of rustic getaways offering ranging from no-frills to truly luxuriant. One glaring void, in my opinion, has been in the cuisine arena. And if you are a gourmand, you can’t truly get away from it all without satisfying your more carnal urges.
This is where Dancing Bear Lodge rises high above its nearby competitors. And competitors there are, in Townsend alone there are thousands of cabins for rent. What sets Dancing Bear apart? For one, it has an excellent pedigree, owned by those experts in accommodations at Blackberry Farms. Also, it offers a great range of rooms and cabins, as well as a truly lovely lodge that houses the restaurant and would make a wonderful location for a mountain-inspired wedding or event.
But really, I’m here to tell you about the food, and the food is great. You won’t find a large menu, but what you will find is seasonally appropriate ingredients prepared with a skilled hand and served in an extremely welcoming environment. The dining area is small and warm and we were lucky to be seated next to a roaring fire on this cool early spring evening. Our charming waitress was quick to supply us with menus, including specialty drinks and a wine list. Feeling like we were on a mini-vacation, my dining partner and I chose to start with a White Dancing Bear Cosmopolitan (white cranberry juice, Cointreau, fresh lime juice, Finlandia vodka, $12), and a Dancing Bear Manhattan (Maker’s Mark whiskey, sweet vermouth, bitters, $10). Both drinks were fresh and delicious, although my Cosmopolitan was a bit sweet for my tastes. While we sipped our libations we perused the concise yet tempting menu.
While looking over the menu we were brought a napkin-wrapped bowl of Tennessee Cheese Puffs, the Lodge’s answer to a bread basket. These airy, cheesy puffs may have been the single best thing I put in my mouth all evening, and you must understand that I loved my dinner. They are that good.
Whilst munching on the cheese puffs I immediately zeroed in on my selections for the evening: Tomato Basil Soup with Garlic Parmesan Croutons ($5); followed by Almond Crusted North Carolina Rainbow Trout, Butter Beans, Roasted Mushrooms, Spinach and Crayfish ($17). The soup arrived quickly and was exactly what I was craving—thick warm, bursting with flavor, and studded with crisp, fresh croutons. I ate every bite and had barely rested my spoon before the bowl was whisked away and replaced with the trout. Now, I am a huge fish fan, I cook it several times a week and really appreciate it when people know how to prepare it well. This delicate filet was masterful—the almond coating was impressively crisp and the fish was impeccably cooked, quite a feat when dealing with such a thin variety. Underneath, I found a bundle of wilted greens surrounded by the butter beans and mushrooms. While I did find the occasional undercooked bean, it hardly detracted from the rustic elegance of the dish. A topping of crunchy fried crayfish finished off a meal that felt both light and decadent.
My companion selected the Iceberg Wedge with Bacon, Sweetwater Valley Cheddar, and Buttermilk Ranch Dressing ($6); and then the Pan Seared Center-Cut Pork Chop with Marinated Mushrooms, Roasted Tomatoes, Green Beans, Mashed Red Potatoes and Fried Onions ($22). His salad was one of those that seems so simple, but can really leave a lasting impression if handled with care. The slivers of local cheese were especially nice paired with the smoky lardons of bacon. I encouraged him to order the pork chop as a test for the kitchen—in my experience as an avid restaurant-goer pork chops are much maligned and usually cooked to a grey, rubbery death. Not so with this hefty, bone-in chop. It was succulent, flavorful, and even though it was cooked completely through (I live dangerously and tend to like pork chops with a touch of pink), it was extremely tender. The accoutrement complemented the rich chop nicely, in particular the vinegary vegetables paired with creamy rough mashed potatoes.
We were quite full after this wonderful meal, but it was so cozy by the fire that dessert seemed to be an obvious decision. After being so delighted with our meal thus far, imagine my disappointment with our choices—an anemic sounding chocolate cake and a “New York-style” cheesecake. Regardless, by this point I was ready for something sweet and since I am normally a huge cheesecake fan that was our choice. Sadly, the dessert did not begin to match up to the rest of the evenings offerings, and while it was in the end tasty, it seemed reminiscent of a frozen cheesecake topped with a quick berry coulis. At a restaurant that succeeds in showcasing so many local specialties, why not a dessert that follows the same bent? Even a piece of really excellent pie would have been more than welcome.
But I can’t let this one small disappointment color the experience overall. Dancing Bear Lodge provides something that Townsend quite needs—a tranquil rustic retreat with world class dining and impeccable service. On our way out the door I mentioned how much I adored the cheese puffs and was delighted to receive the recipe in an email later that weekend. These are the details that will have those of us in Knoxville making the one hour drive again and again—dinner at Dancing Bear Lodge was a lovely little escape that left me wishing I was staying for the entire weekend. Sounds like a perfect excuse for another trip…
Rating (out of 5 stars):
****½
Dancing Bear Lodge
www.dancingbearlodge.com
137 Apple Valley Way
Townsend, Tennessee 37822
865.448.6000 phone
865.448.3075 fax
info@dancingbearlodge.com
reservations for dinner are required
TENNESSEE CHEDDAR PUFFS
courtesy of Dancing Bear Lodge
Makes about 80
10 ounces cheddar cheese
2 cups water
2 cups flour
8 ounces unsalted butter
2 tsp sugar
2 tsp salt
1/8 tsp cayenne
8 eggs
Preheat oven to 400 degrees.
Grate cheese and set aside. Melt butter with water, sugar, salt, and cayenne. Once butter is completely melted with the water add the flour all at once. Reduce heat and stir with a wooden spoon constantly for 1 minute. Pour into mixing bowl and mix with paddle attachment for 1 minute on medium low to cool the mixture. Increase speed to medium and add eggs one at a time making sure each one is incorporated before adding the next. Fold in grated cheese. Drop with a small ice cream scoop (or you can use two spoons) onto sheet pan lined with parchment paper or a silicone liner. Sprinkle with paprika.
Bake for 11 minutes, turn the pan and bake for 11 more minutes. Serve warm.
This recipe is easily halved and once cooled, leftover puffs can be frozen.

Recipes and food chatter from a girl with too much time on her hands.
Showing posts with label Baking. Show all posts
Showing posts with label Baking. Show all posts
Wednesday, May 09, 2007


Tuesday, November 21, 2006
Bread, again, some more.
Yes, I made the bread again. This recipe has become quite the Internet phenomenon! This time I made some notable changes and the results were worth mentioning.
From Rose, I got the idea to sub 3 Tbsp. of whole wheat flour for an equal amount of white flour. Then I watched the video one more time before they started charging for it, and noticed that Jim Lehey just scoops the flour out with his measuring cup--rather than lightly spooning flour into the cup, as I've been taught to do. Using this method, I am probably using more flour, which left me with a much more manageable dough. I was also much more generous with the flouring of the dough and surfaces. Lastly, I used 1.5 cups of water, as was called for in the video, but not the recipe.
My dough, as I mentioned, was much easier to handle and behaved as it was supposed to. The resulting bread was another triumph and I can't wait to make it again and again and again. Sadly, for this go I was so swept up in the results that I didn't take a picture (horrors!), but it rose more and had a terrific flavor.
From Rose, I got the idea to sub 3 Tbsp. of whole wheat flour for an equal amount of white flour. Then I watched the video one more time before they started charging for it, and noticed that Jim Lehey just scoops the flour out with his measuring cup--rather than lightly spooning flour into the cup, as I've been taught to do. Using this method, I am probably using more flour, which left me with a much more manageable dough. I was also much more generous with the flouring of the dough and surfaces. Lastly, I used 1.5 cups of water, as was called for in the video, but not the recipe.
My dough, as I mentioned, was much easier to handle and behaved as it was supposed to. The resulting bread was another triumph and I can't wait to make it again and again and again. Sadly, for this go I was so swept up in the results that I didn't take a picture (horrors!), but it rose more and had a terrific flavor.
Friday, November 10, 2006
The Best Bread I've Ever Made.
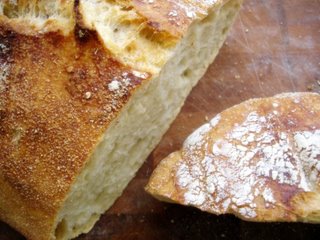
Sticking my head above the towering pile of freelance work I'm buried under (not that I'm complaining one bit! Yay money!), to tell you to try this recipe. It's weird, and not quite perfect, but it produced the absolute best bread that has ever come out of my oven. Thin, crackling crust, airy, gorgeous crumb, and it's delicious too.
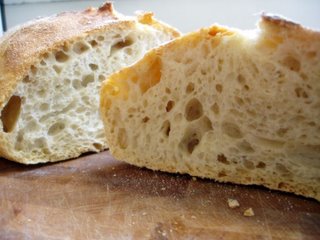
In case the Times decides to start charging for the article after a couple of weeks, here it is. A word of caution: in the accompanying video only 1.5 cups of water is called for, and I think that's what should be used. My dough was beyond loose and shaggy--it was more like trying to handle a thick pancake batter. But still, even though the whole time I was working with it I was sure it wasn't going to work, it was fantastic.
No-Knead Bread
makes one 1.5 pound loaf
Originally published by Mark Bittman in the New York Times
Adapted from Jim Lahey, Sullivan Street Bakery
Time: About 1½ hours plus 14 to 20 hours rising
3 cups all-purpose or bread flour, more for dusting
¼ teaspoon instant yeast
1¼ teaspoons salt (note: I use a heaping two teaspoons of salt)
Cornmeal or wheat bran as needed.
1. In a large bowl combine flour, yeast and salt. Add 1 5/8 cups water (very important note: this amount should be 1.5 cups but was misprinted in the Times), and stir until blended; dough will be shaggy and sticky. Cover bowl with plastic wrap. Let dough rest at least 12 hours, preferably about 18, at warm room temperature, about 70 degrees.
2. Dough is ready when its surface is dotted with bubbles. Lightly flour a work surface and place dough on it; sprinkle it with a little more flour and fold it over on itself once or twice. Cover loosely with plastic wrap and let rest about 15 minutes.
3. Using just enough flour to keep dough from sticking to work surface or to your fingers, gently and quickly shape dough into a ball. Generously coat a cotton towel (not terry cloth) with flour, wheat bran or cornmeal; put dough seam side down on towel and dust with more flour, bran or cornmeal. Cover with another cotton towel and let rise for about 2 hours. When it is ready, dough will be more than double in size and will not readily spring back when poked with a finger.
4. At least a half-hour before dough is ready, heat oven to 450 degrees (note: 500 degrees works even better). Put a 6- to 8-quart heavy covered pot (cast iron, enamel, Pyrex or ceramic) in oven as it heats. When dough is ready, carefully remove pot from oven. Slide your hand under towel and turn dough over into pot, seam side up; it may look like a mess, but that is O.K. Shake pan once or twice if dough is unevenly distributed; it will straighten out as it bakes. Cover with lid and bake 30 minutes, then remove lid and bake another 15 to 30 minutes, until loaf is beautifully browned. Cool on a rack.

In case the Times decides to start charging for the article after a couple of weeks, here it is. A word of caution: in the accompanying video only 1.5 cups of water is called for, and I think that's what should be used. My dough was beyond loose and shaggy--it was more like trying to handle a thick pancake batter. But still, even though the whole time I was working with it I was sure it wasn't going to work, it was fantastic.

No-Knead Bread
makes one 1.5 pound loaf
Originally published by Mark Bittman in the New York Times
Adapted from Jim Lahey, Sullivan Street Bakery
Time: About 1½ hours plus 14 to 20 hours rising
3 cups all-purpose or bread flour, more for dusting
¼ teaspoon instant yeast
1¼ teaspoons salt (note: I use a heaping two teaspoons of salt)
Cornmeal or wheat bran as needed.
1. In a large bowl combine flour, yeast and salt. Add 1 5/8 cups water (very important note: this amount should be 1.5 cups but was misprinted in the Times), and stir until blended; dough will be shaggy and sticky. Cover bowl with plastic wrap. Let dough rest at least 12 hours, preferably about 18, at warm room temperature, about 70 degrees.
2. Dough is ready when its surface is dotted with bubbles. Lightly flour a work surface and place dough on it; sprinkle it with a little more flour and fold it over on itself once or twice. Cover loosely with plastic wrap and let rest about 15 minutes.
3. Using just enough flour to keep dough from sticking to work surface or to your fingers, gently and quickly shape dough into a ball. Generously coat a cotton towel (not terry cloth) with flour, wheat bran or cornmeal; put dough seam side down on towel and dust with more flour, bran or cornmeal. Cover with another cotton towel and let rise for about 2 hours. When it is ready, dough will be more than double in size and will not readily spring back when poked with a finger.
4. At least a half-hour before dough is ready, heat oven to 450 degrees (note: 500 degrees works even better). Put a 6- to 8-quart heavy covered pot (cast iron, enamel, Pyrex or ceramic) in oven as it heats. When dough is ready, carefully remove pot from oven. Slide your hand under towel and turn dough over into pot, seam side up; it may look like a mess, but that is O.K. Shake pan once or twice if dough is unevenly distributed; it will straighten out as it bakes. Cover with lid and bake 30 minutes, then remove lid and bake another 15 to 30 minutes, until loaf is beautifully browned. Cool on a rack.
Saturday, September 30, 2006
Three-Onion Tart and Corn Bisque--the kitchen is finished!
That's right, the over-two-week long kitchen renovation is complete, and things are looking mighty fine. Not everything is clean and back in its place just yet, so you will have to wait for photos of our accomplishment, but even better than kitchen photos?
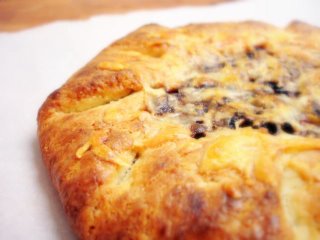
Food photos! I am finally able to cook a complete meal in my kitchen again. While there's been some cooking in the past couple of weeks, it hasn't come easily and creativity has not really been an option.
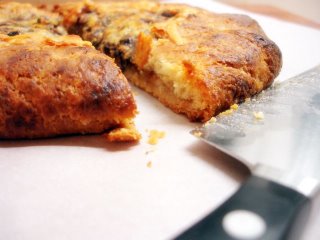
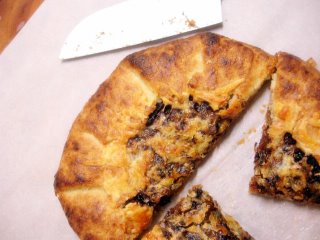
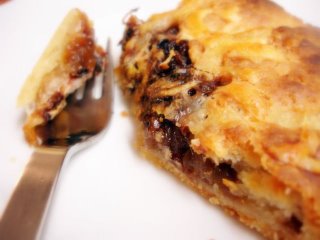
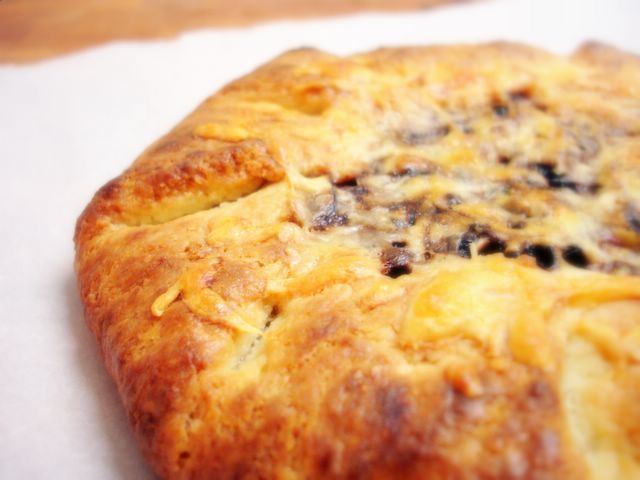
So, I read Elise's blog fairly religiously--she always strikes a perfect balance between education and really creative cooking--and when she posted this recipe for a rustic onion tart earlier this week, I knew I had to make it. What better way to get back in the kitchen than with a baking project? I followed her recipe nearly to the letter (her pastry recipe is perfection), with one exception--I only had one red onion, so I also used two yellow onions and a massive shallot I had sitting around--thus the "Three Onion" distinction. This is a beautiful tart to look at, folks, and even better tasting. Go celebrate the cooling weather and make one for yourself!

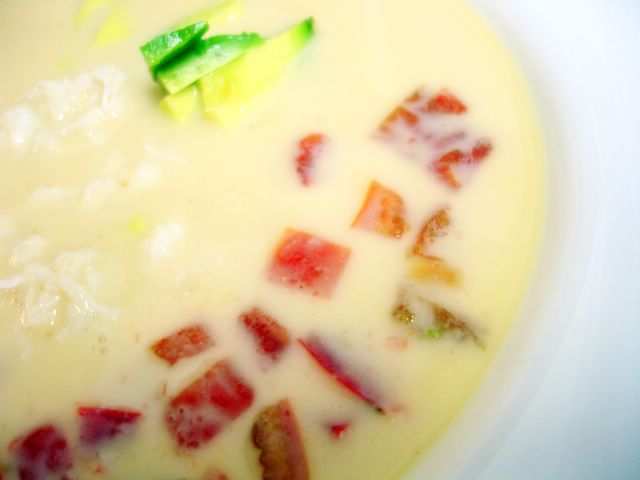
The soup was born out of inspiration from a Cooking Light recipe (I've been on a dreaded diet, yet another reason I haven't been posting much), and with a couple of ears of late summer sweet corn languishing in the refrigerator, I couldn't resist making it my own. The result was sweet, delicious, and deceptively rich-tasting. Topped with a mound of fresh crab meat, a sprinkling of heirloom tomato, and chunks of ripe avocado, I felt it was a fitting goodbye to summer.

Food photos! I am finally able to cook a complete meal in my kitchen again. While there's been some cooking in the past couple of weeks, it hasn't come easily and creativity has not really been an option.

So, I read Elise's blog fairly religiously--she always strikes a perfect balance between education and really creative cooking--and when she posted this recipe for a rustic onion tart earlier this week, I knew I had to make it. What better way to get back in the kitchen than with a baking project? I followed her recipe nearly to the letter (her pastry recipe is perfection), with one exception--I only had one red onion, so I also used two yellow onions and a massive shallot I had sitting around--thus the "Three Onion" distinction. This is a beautiful tart to look at, folks, and even better tasting. Go celebrate the cooling weather and make one for yourself!


The soup was born out of inspiration from a Cooking Light recipe (I've been on a dreaded diet, yet another reason I haven't been posting much), and with a couple of ears of late summer sweet corn languishing in the refrigerator, I couldn't resist making it my own. The result was sweet, delicious, and deceptively rich-tasting. Topped with a mound of fresh crab meat, a sprinkling of heirloom tomato, and chunks of ripe avocado, I felt it was a fitting goodbye to summer.

Thursday, June 15, 2006
Homemade Buns and Other News...

A few days ago I was smart enough to take a crack at Kevin's recipe for Black Pepper & Garlic Buns, and my, am I ever glad I did. I made minimal substitutions, namely using only white flour (I didn't have any whole wheat, and I'm lazy), white pepper (same), and shaping them into hoagie-style buns.
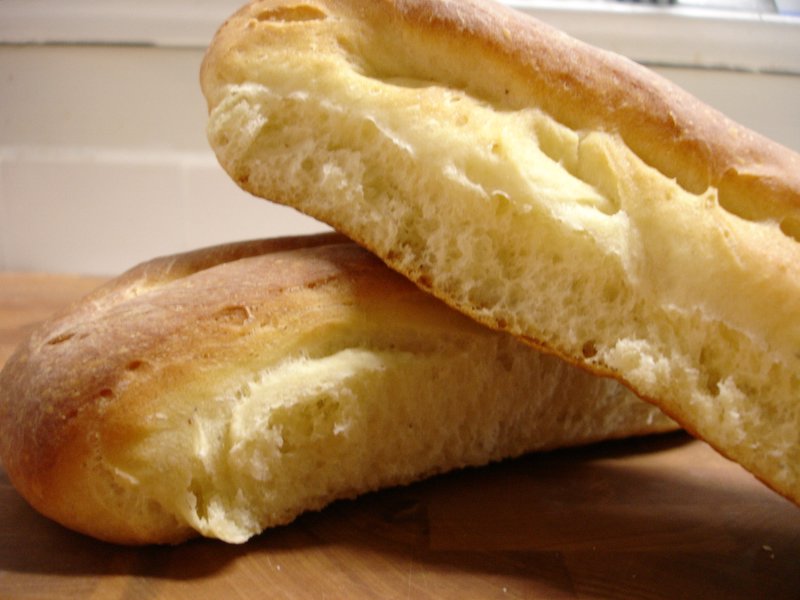

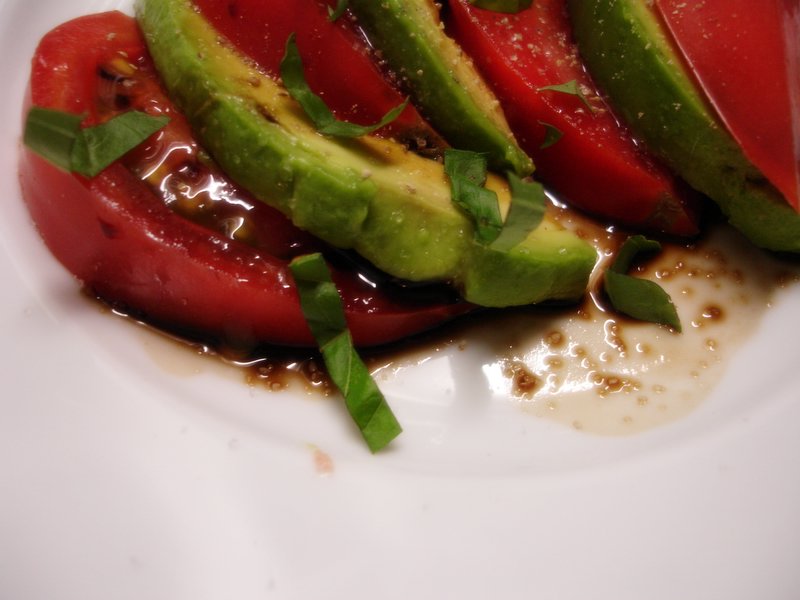
We had these with some fresh Italian sausages picked up at the Farmer's Market, sweet corn on the cob, and a nice avocado and tomato salad.

In other news, one of the projects I've been working on has come to fruition--I will now being doing restaurant reviews (and other food-related writing) for Knoxville's Cityview Magazine. They are revamping their website at the moment, but once it is up and running I will link to monthly reviews and other tidbits. Needless to say, I am pretty excited about this opportunity and can't believe I get paid to do this.
Locals, look for my review of new restaurant La Costa in the July issue, on newsstands at the end of June.
Monday, June 05, 2006
Mixed Berry Tarts (and no excuses)
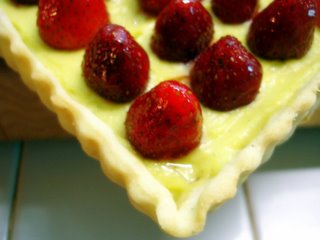
I'm just going to avert my eyes and jump right into the recipe, because I can't handle your accusing stares right now. I'm sorry! But I'm not here to make excuses. Look, shiny pretty tart:
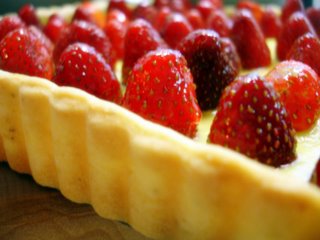
Now, since I wrote last I have finally acquired a food processor, and my life in the kitchen has honestly changed. I used it twice the day I bought it, and have used it multiple times a week since then. The best thing about it, so far, is the improvement my pie crusts have seen. People, I have made the perfect pie crust. And lo, it is good.

Along with the fancy food processor I picked up an adorable square tart pan and some exceedingly good vanilla beans. The tart pan inspired some sort of tart mania that has resulted in some very rich creations, and what appears to be a budding pot belly. I've had to take up swimming just to counter the Tart Problem.
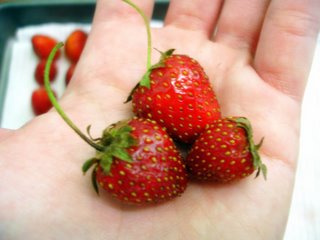
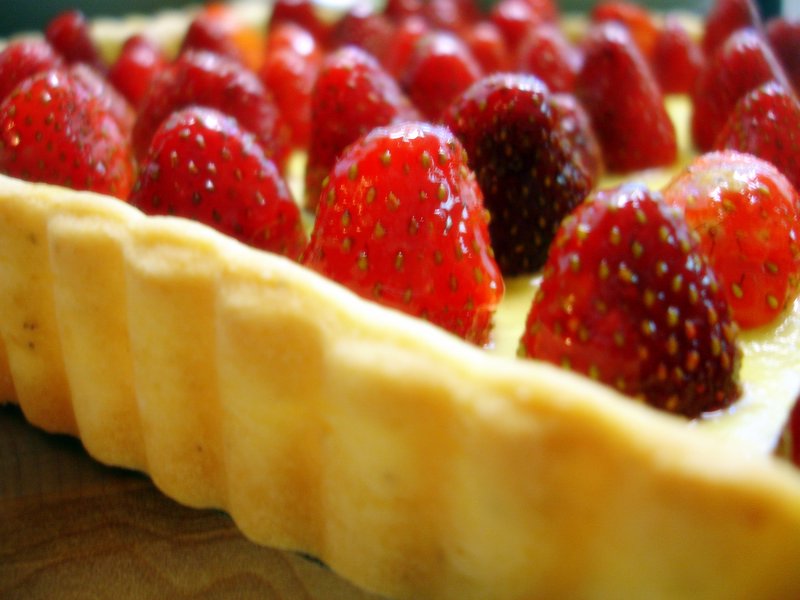
The whole reason I was inspired to get on this tart kick was because of these tiny strawberries. I defy anyone that likes strawberries to not freak out a little upon seeing these fingernail-sized specimens. I made my first stab at pastry cream (good, but too thick and gummy in texture), and attempted a pie crust idea that lived in my wee noggin. The crust was fine, it wasn't exactly tender and tasted more like cornbread than I preferred, but it was serviceable and didn't reduce me to tears. Altogether the tart was well received and eaten in approximately 11 minutes by our friends.
But I was not satisfied!
And so, I tried again. This time, I took the pie crust idea in my head and merged it with a recipe from this month's issue of Fine Cooking. The result was magnificent--flaky and crisp with this almost buttermilk flavor that made me swoon. The pastry cream was perfect, too--firm enough to hold up to slicing, but delightfully rich and oozy (and boozy, for that matter). I am still perfecting the measurements for my ground breaking "less fat" chocolate ganache, so you can either use your own recipe or skip it all together. You really can't go wrong.
When I test out a new recipe on people (the first at a Memorial Day party, the second at a gathering of Knoxville food bloggers), I always make some miniatures so that I can test things and make sure they are not poison. For these sweet babies I cut out circles of dough with a large drinking glass and carefully lined a muffin tin with them. To weigh down the crust, you can use a muffin liner and pie weights (I use rice) to good effect. You can make this gorgeous tart with any combination of seasonal berries.

Mixed Berry Tart
with thanks to Fine Cooking magazine
for the crust:
1.75 cups all-purpose flour
2 Tbsp cornmeal
12 Tbsp chilled butter, cut into chunks
1 egg, beaten
2 Tbsp sugar
1 Tbsp milk
2 tsp lemon juice
pinch salt (if you use salted butter, do not add salt)
In a food processor, combine all ingredients and pulse until the dough has begun to form big clumps (you want to go past the pea sized clumps and really incorporate the dough). Roll out a large piece of cling wrap and carefully dump the dough out onto it--the dough will seem a little loose and dry. Using your hands, press the dough into a compact patty and chill for 15 minutes.
After removing the dough from the refrigerator, let it sit for a few minutes. You want the dough to be cool, but not so cold that it cracks when you try to roll it out. Roll out to your desired thickness and shape, and place in a tart pan.
Preheat oven to 400 degrees. Using a fork, poke some holes in the bottom of the pie crust. Carefully line the crust with aluminum foil or parchment paper, and fill with pie weights (or dried beans or rice). Bake for roughly 25 minutes, until the edges are a deep golden brown. Remove from oven and let cool on a metal rack. Be careful when removing the pie weights, they can get pretty hot.

for the rum-vanilla pastry cream:
1.25 cups milk (I use 1%)
half of a vanilla bean, split down the middle
3 large egg yolks
.25 cups sugar
3 Tbsp flour
2 scant Tbsp cornstarch
1 Tbsp spiced rum (or liqueur of your choice)
Place milk and vanilla bean in a medium saucepan and bring to a low boil. While the milk is heat, whisk together the egg yolks and sugar, then add the flour and cornstarch. This mixture will be pretty thick. Once milk has reached a boil, remove from heat and remove vanilla bean. Scrape vanilla seeds out and add to egg mixture (you can use the dried vanilla pod to make vanilla sugar). Slowly temper the egg mixture by whisking in the hot milk, a few spoonfuls at a time.
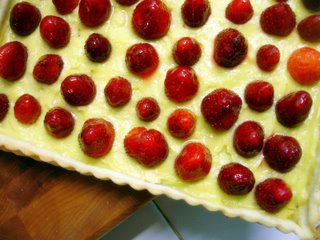
Once the milk is mixed into the egg mixture, pour back into the saucepan. Cook over medium heat, whisking constantly, until the mixture comes to a boil. It will thicken very quickly, so keep an eye on it and keep whisking. Once the mixture has thickened to a pudding-like consistency, remove from heat and whisk in your liqueur (the liqueur is optional, of course). Pour into a bowl and press cling wrap down on the cream to prevent a skin from forming. Let cool completely.
To assemble tart, spread a layer of chocolate ganache on the tart crust, if you are so inclined. Like I said up top, I'm still working out the measurements for my magical less-fat ganache, so I didn't include the recipe. The tart is certainly still delicious without it.
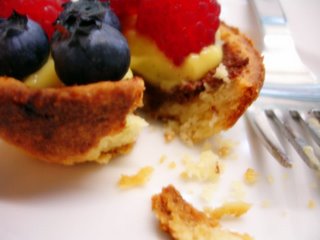
After the ganache, carefully spread the cooled pastry cream on the tart. Top with any fresh berries you can get your hands on, and serve to your adoring guests. If you want to be extra fancy, you can brush a little melted apricot jelly over the fruit to make it look all shiny and professional.
This one's worth every second of work, folks.
Now, since I wrote last I have finally acquired a food processor, and my life in the kitchen has honestly changed. I used it twice the day I bought it, and have used it multiple times a week since then. The best thing about it, so far, is the improvement my pie crusts have seen. People, I have made the perfect pie crust. And lo, it is good.

Along with the fancy food processor I picked up an adorable square tart pan and some exceedingly good vanilla beans. The tart pan inspired some sort of tart mania that has resulted in some very rich creations, and what appears to be a budding pot belly. I've had to take up swimming just to counter the Tart Problem.
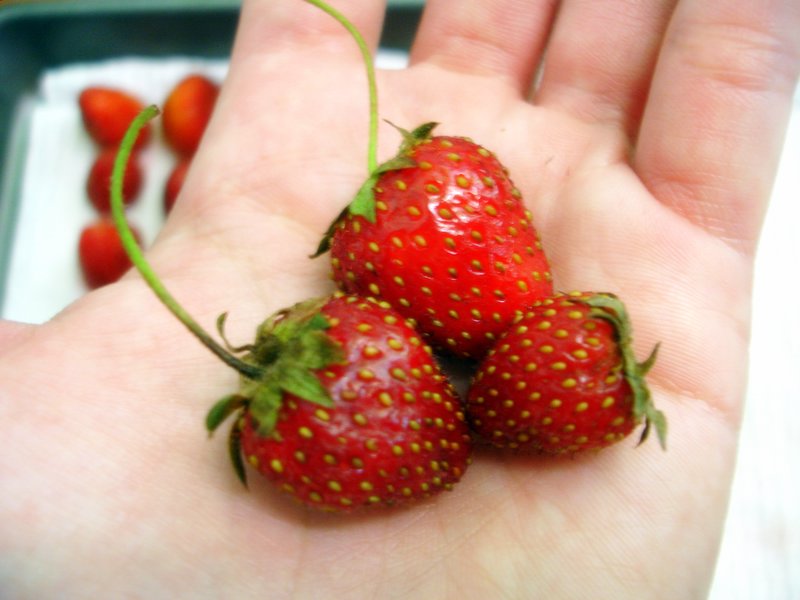
The whole reason I was inspired to get on this tart kick was because of these tiny strawberries. I defy anyone that likes strawberries to not freak out a little upon seeing these fingernail-sized specimens. I made my first stab at pastry cream (good, but too thick and gummy in texture), and attempted a pie crust idea that lived in my wee noggin. The crust was fine, it wasn't exactly tender and tasted more like cornbread than I preferred, but it was serviceable and didn't reduce me to tears. Altogether the tart was well received and eaten in approximately 11 minutes by our friends.

But I was not satisfied!
And so, I tried again. This time, I took the pie crust idea in my head and merged it with a recipe from this month's issue of Fine Cooking. The result was magnificent--flaky and crisp with this almost buttermilk flavor that made me swoon. The pastry cream was perfect, too--firm enough to hold up to slicing, but delightfully rich and oozy (and boozy, for that matter). I am still perfecting the measurements for my ground breaking "less fat" chocolate ganache, so you can either use your own recipe or skip it all together. You really can't go wrong.
When I test out a new recipe on people (the first at a Memorial Day party, the second at a gathering of Knoxville food bloggers), I always make some miniatures so that I can test things and make sure they are not poison. For these sweet babies I cut out circles of dough with a large drinking glass and carefully lined a muffin tin with them. To weigh down the crust, you can use a muffin liner and pie weights (I use rice) to good effect. You can make this gorgeous tart with any combination of seasonal berries.

Mixed Berry Tart
with thanks to Fine Cooking magazine
for the crust:
1.75 cups all-purpose flour
2 Tbsp cornmeal
12 Tbsp chilled butter, cut into chunks
1 egg, beaten
2 Tbsp sugar
1 Tbsp milk
2 tsp lemon juice
pinch salt (if you use salted butter, do not add salt)
In a food processor, combine all ingredients and pulse until the dough has begun to form big clumps (you want to go past the pea sized clumps and really incorporate the dough). Roll out a large piece of cling wrap and carefully dump the dough out onto it--the dough will seem a little loose and dry. Using your hands, press the dough into a compact patty and chill for 15 minutes.
After removing the dough from the refrigerator, let it sit for a few minutes. You want the dough to be cool, but not so cold that it cracks when you try to roll it out. Roll out to your desired thickness and shape, and place in a tart pan.
Preheat oven to 400 degrees. Using a fork, poke some holes in the bottom of the pie crust. Carefully line the crust with aluminum foil or parchment paper, and fill with pie weights (or dried beans or rice). Bake for roughly 25 minutes, until the edges are a deep golden brown. Remove from oven and let cool on a metal rack. Be careful when removing the pie weights, they can get pretty hot.

for the rum-vanilla pastry cream:
1.25 cups milk (I use 1%)
half of a vanilla bean, split down the middle
3 large egg yolks
.25 cups sugar
3 Tbsp flour
2 scant Tbsp cornstarch
1 Tbsp spiced rum (or liqueur of your choice)
Place milk and vanilla bean in a medium saucepan and bring to a low boil. While the milk is heat, whisk together the egg yolks and sugar, then add the flour and cornstarch. This mixture will be pretty thick. Once milk has reached a boil, remove from heat and remove vanilla bean. Scrape vanilla seeds out and add to egg mixture (you can use the dried vanilla pod to make vanilla sugar). Slowly temper the egg mixture by whisking in the hot milk, a few spoonfuls at a time.

Once the milk is mixed into the egg mixture, pour back into the saucepan. Cook over medium heat, whisking constantly, until the mixture comes to a boil. It will thicken very quickly, so keep an eye on it and keep whisking. Once the mixture has thickened to a pudding-like consistency, remove from heat and whisk in your liqueur (the liqueur is optional, of course). Pour into a bowl and press cling wrap down on the cream to prevent a skin from forming. Let cool completely.
To assemble tart, spread a layer of chocolate ganache on the tart crust, if you are so inclined. Like I said up top, I'm still working out the measurements for my magical less-fat ganache, so I didn't include the recipe. The tart is certainly still delicious without it.

After the ganache, carefully spread the cooled pastry cream on the tart. Top with any fresh berries you can get your hands on, and serve to your adoring guests. If you want to be extra fancy, you can brush a little melted apricot jelly over the fruit to make it look all shiny and professional.
This one's worth every second of work, folks.
Friday, April 28, 2006
Quiche aux Fine Herbs (waxing poetic)
The sunlight in East Tennessee is often magical, but it is even more so in the spring. The light is golden, dappled, filtered through the chartreuse new leaves popping out on trees. Suddenly, everyone looks more attractive, the noisy world fades to a lazy whisper, and you are content to do absolutely nothing, other than soaking in this just-warm-enough sun.

Of course, there are ramifications, jolting bursts of reality that shake your sun-addled brain awake. Before you know it, you've ignored your garden for two weeks and there are terrifying new weeds and enormous heads of neglected lettuce taking over. You haven't been to the grocery store in ages, and now you aren't sure what kind of dinner you can cobble together. You are suddenly conscious of your laziness and feel the need to take on a project. You bake bread, making rolls, hamburger buns, a mock baguette. But still the threat of dinner looms. You decide to take on your herb garden and are immediately presented with an answer: quiche.

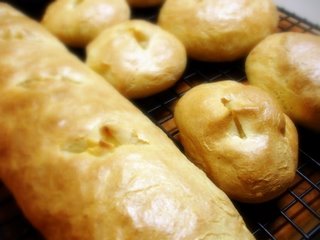
The recipe varies a bit from my classic mushroom quiche, but of course the idea remains the same. Weed your herb garden, trimming back the fragrant plants, and put those trimmings to good use at dinner. If you have eggs, cream, and a few cheeses, you are already halfway to a simple dinner, made to be enjoyed while cool breezes blow through your tranquil, if only for a moment, home.
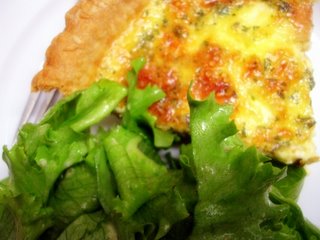
Quiche aux Fine Herbs
serves 4-6 (the leftovers are lovely)
1 pie crust, homemade or store bought
1 medium yellow onion, finely chopped
pat butter
olive oil
3 eggs + 1 egg yolk
.5 cup cream
.5 cup 1% milk
1.5 cups of shredded cheese (I used a mixture of Parmesan, Gruyere, and chevre)
small pinch freshly ground nutmeg
2 Tbsp finely minced fresh herbs (I used flat leaf parsley, rosemary, thyme, lovage, and chives)
sea salt
freshly ground pepper
Preheat oven to 350 degrees. Prick the bottom of your pie crust several times with a fork, and then bake until dry, but not brown (about 10 minutes). Remove from oven and set aside to cool.
Place the butter and a drizzle of olive oil in a medium saute pan over medium heat. Add onions and saute until translucent and beginning to turn golden brown around the edges. Set aside to cool.
In a bowl, whisk together the milk, cream, and eggs until very well combined. Add a pinch of salt, and a few grinds of pepper and nutmeg. Lastly, whisk in your herbs. Sprinkle half of your cheese mix over the bottom of your cooled pie crust. Spread the cooked onions over the cheese evenly, then top with the remaining cheese. Pour the egg mixture over the top.

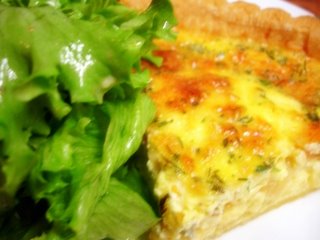
Bake at 350 degrees for 35-45 minutes, until the surface is a nice golden brown. Remove and let cool for at least 10 minutes (I actually pulled this out of the oven 1 hour before I planned to serve it, and it was perfect). Serve with a crisp green salad and an icy cold glass of white wine. Enjoy your meal, and let yourself slip back into delicious laziness, because the work can wait until tomorrow.

Of course, there are ramifications, jolting bursts of reality that shake your sun-addled brain awake. Before you know it, you've ignored your garden for two weeks and there are terrifying new weeds and enormous heads of neglected lettuce taking over. You haven't been to the grocery store in ages, and now you aren't sure what kind of dinner you can cobble together. You are suddenly conscious of your laziness and feel the need to take on a project. You bake bread, making rolls, hamburger buns, a mock baguette. But still the threat of dinner looms. You decide to take on your herb garden and are immediately presented with an answer: quiche.


The recipe varies a bit from my classic mushroom quiche, but of course the idea remains the same. Weed your herb garden, trimming back the fragrant plants, and put those trimmings to good use at dinner. If you have eggs, cream, and a few cheeses, you are already halfway to a simple dinner, made to be enjoyed while cool breezes blow through your tranquil, if only for a moment, home.

Quiche aux Fine Herbs
serves 4-6 (the leftovers are lovely)
1 pie crust, homemade or store bought
1 medium yellow onion, finely chopped
pat butter
olive oil
3 eggs + 1 egg yolk
.5 cup cream
.5 cup 1% milk
1.5 cups of shredded cheese (I used a mixture of Parmesan, Gruyere, and chevre)
small pinch freshly ground nutmeg
2 Tbsp finely minced fresh herbs (I used flat leaf parsley, rosemary, thyme, lovage, and chives)
sea salt
freshly ground pepper
Preheat oven to 350 degrees. Prick the bottom of your pie crust several times with a fork, and then bake until dry, but not brown (about 10 minutes). Remove from oven and set aside to cool.
Place the butter and a drizzle of olive oil in a medium saute pan over medium heat. Add onions and saute until translucent and beginning to turn golden brown around the edges. Set aside to cool.
In a bowl, whisk together the milk, cream, and eggs until very well combined. Add a pinch of salt, and a few grinds of pepper and nutmeg. Lastly, whisk in your herbs. Sprinkle half of your cheese mix over the bottom of your cooled pie crust. Spread the cooked onions over the cheese evenly, then top with the remaining cheese. Pour the egg mixture over the top.
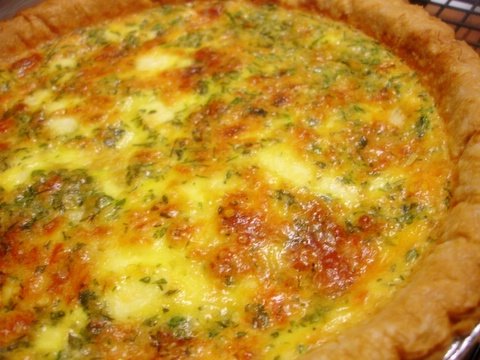
Bake at 350 degrees for 35-45 minutes, until the surface is a nice golden brown. Remove and let cool for at least 10 minutes (I actually pulled this out of the oven 1 hour before I planned to serve it, and it was perfect). Serve with a crisp green salad and an icy cold glass of white wine. Enjoy your meal, and let yourself slip back into delicious laziness, because the work can wait until tomorrow.

Friday, April 07, 2006
An Epiphany (Or, How I Made Brioche)
While I have been gaining confidence as a baker, I still hold a comfortable amount of trepidation when it comes to certain, okay most, flaky French breads. The idea of attempting a truly perfect croissant makes me break out in a sweat, and honestly I always put buttery brioche on the same pedestal.
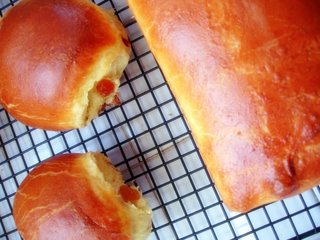
Until now.
Ina Garten can be so convincing, she always seems to confident that I can make something. Even better, unlike a certain sexy Brit, her recipes are very clear and usually work out perfectly with little interpretation. Such is the case with her recipe for Brioche Loaves, which I tweaked and fiddled with to my liking. Once I worked out two uncharacteristic and potentially ruinous typos (to paraphrase a friend, "Put some shoes on and get to proofreading, Ina!"), I set out to make the bread of my dreams.
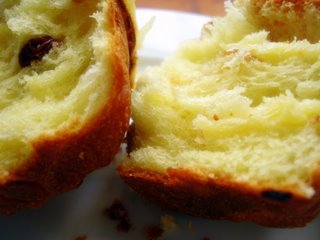
The epiphany came whilst rolling golden raisins into the dough, "If this works...I could have brioche all the time." And work it did, producing excellently light brioche that was tender and exquisite. I fear we have entered a dark time for my waistline.
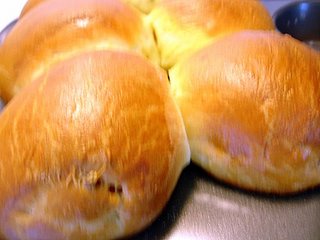
I made one brioche loaf and 6 "muffins" of my own design--who needs dear little brioche pans when you have a nice non-stick muffin tin? Next time, unless I need loaf for a particular dish (as I did last night), I will make a whole pan of my delicious muffins--studded with golden raisins and dried cherries, they are the perfect breakfast or mid-afternoon snack.
Brioche Muffins (or Loaves, or both)
makes 12 muffins, or 2 loaves
with thanks to Ina Garten
.5 cup warm water
1 package active dry yeast
3 Tbsp sugar
6 large eggs, at room temperature
4.25 cups unbleached flour (King Arthur is the best)
2 tsp salt
2 sticks butter, very soft (leave it out overnight)
1 egg, for egg wash
1 Tbsp milk, for egg wash
1 cup golden raisins and dried cherries (optional)
Warm the bowl of your mixer with hot water, then dump it out. Mix the yeast, warm water, and sugar in the warmed bowl with a rubber spatula. Let sit for 5 minutes, until it is foamy and the sugar has dissolved. Add the eggs and using the paddle attachment, beat on medium speed for 1 minute, until mixed.
With the mixer on low speed, add 2 cups of the flour, and the salt, and mix for 5 minutes. With the mixer still on low, add two more cups of flour and mix for 5 minutes more. Still on low, add the soft butter in chunks and mix for 2 minutes, occasionally scraping the paddle, for 2 minutes longer.
Switch to the dough hook attachment, and set on low speed again. While the mixer is running, sprinkle in the last quarter cup of flour. Mix on low speed for 3-4 minutes, until well combined and elastic, but still sticky. This is a soft, sticky dough. Scrape the dough into a large buttered bowl and cover tightly with plastic wrap. Refrigerate overnight.
The next day, allow the dough to sit at room temperature for an hour--it should have risen substantially in the fridge. Grease a 12-muffin tin, if you are making muffins, or two loaf pans. As you see, I did a little of both.
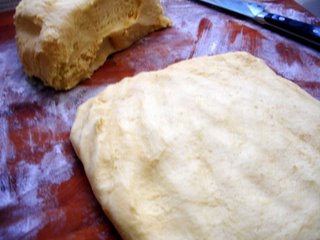
Turn the dough onto a floured surface and cut in half. For muffins: pat each half into a rectangle with the dough about a half inch thick. Spread the raisins and dried cherries evenly over the rectangle, using more if desired. Starting on one of the rectangle's wide ends, roll up into a tight cylinder. The dough may stick, use a pastry scraper or a sharp knife to help loosen it. Pinch the seam closed. Cut each cylinder into 6 equal portions. Stick each dough portion seam side down into the muffin tin. Cover and let rise in a warm spot for 2 hours, until doubled in size.
For loaves: pat each half into a 6x8 rectangle, and roll on the wider side, as instructed above (note: I did not use the fruit in my loaf, but you certainly could if you wanted). Place each cylinder, seam side down, in a loaf pan. Cover and let rise in a warm spot for 2 hours, until doubled in size.

Preheat the oven to 375 degrees (as always, I recommend preheating for at least an hour to let the oven heat to a very even temperature). Beat the egg with the milk and brush the tops of the risen muffins (or loaves). Bake the muffins for 25-30 minutes, until they are a deep golden brown. Bake loaves for 30-35 minutes. Let cool briefly in their pans before transferring to a wire rack to cool completely. You absolutely MUST eat a muffin while still deliriously warm, if you don't I'm not sure that we can be friends any more.
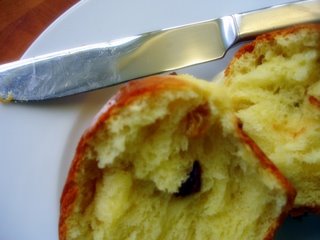
Once everything has cooled completely it can be wrapped in parchment and stored in a plastic bag for up to three days, or frozen for a month. I'm sorry there aren't more pictures of the baking process, but once I touched the dough it was all over my hands and I just had to get it done. Make brioche this weekend!
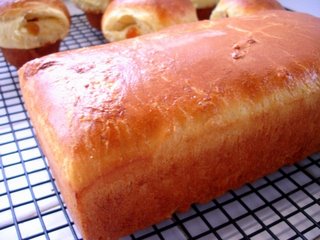

Until now.
Ina Garten can be so convincing, she always seems to confident that I can make something. Even better, unlike a certain sexy Brit, her recipes are very clear and usually work out perfectly with little interpretation. Such is the case with her recipe for Brioche Loaves, which I tweaked and fiddled with to my liking. Once I worked out two uncharacteristic and potentially ruinous typos (to paraphrase a friend, "Put some shoes on and get to proofreading, Ina!"), I set out to make the bread of my dreams.
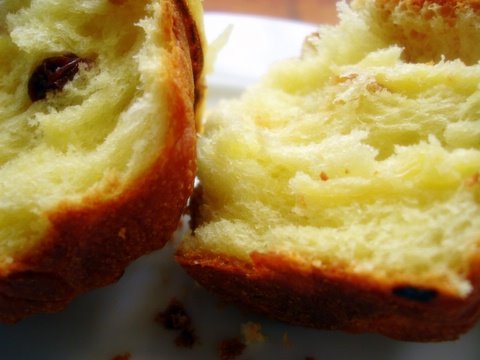
The epiphany came whilst rolling golden raisins into the dough, "If this works...I could have brioche all the time." And work it did, producing excellently light brioche that was tender and exquisite. I fear we have entered a dark time for my waistline.
I made one brioche loaf and 6 "muffins" of my own design--who needs dear little brioche pans when you have a nice non-stick muffin tin? Next time, unless I need loaf for a particular dish (as I did last night), I will make a whole pan of my delicious muffins--studded with golden raisins and dried cherries, they are the perfect breakfast or mid-afternoon snack.

Brioche Muffins (or Loaves, or both)
makes 12 muffins, or 2 loaves
with thanks to Ina Garten
.5 cup warm water
1 package active dry yeast
3 Tbsp sugar
6 large eggs, at room temperature
4.25 cups unbleached flour (King Arthur is the best)
2 tsp salt
2 sticks butter, very soft (leave it out overnight)
1 egg, for egg wash
1 Tbsp milk, for egg wash
1 cup golden raisins and dried cherries (optional)
Warm the bowl of your mixer with hot water, then dump it out. Mix the yeast, warm water, and sugar in the warmed bowl with a rubber spatula. Let sit for 5 minutes, until it is foamy and the sugar has dissolved. Add the eggs and using the paddle attachment, beat on medium speed for 1 minute, until mixed.
With the mixer on low speed, add 2 cups of the flour, and the salt, and mix for 5 minutes. With the mixer still on low, add two more cups of flour and mix for 5 minutes more. Still on low, add the soft butter in chunks and mix for 2 minutes, occasionally scraping the paddle, for 2 minutes longer.
Switch to the dough hook attachment, and set on low speed again. While the mixer is running, sprinkle in the last quarter cup of flour. Mix on low speed for 3-4 minutes, until well combined and elastic, but still sticky. This is a soft, sticky dough. Scrape the dough into a large buttered bowl and cover tightly with plastic wrap. Refrigerate overnight.
The next day, allow the dough to sit at room temperature for an hour--it should have risen substantially in the fridge. Grease a 12-muffin tin, if you are making muffins, or two loaf pans. As you see, I did a little of both.
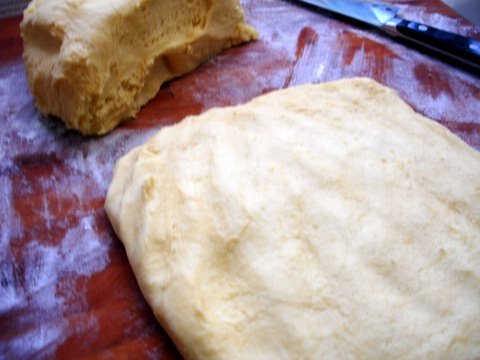
Turn the dough onto a floured surface and cut in half. For muffins: pat each half into a rectangle with the dough about a half inch thick. Spread the raisins and dried cherries evenly over the rectangle, using more if desired. Starting on one of the rectangle's wide ends, roll up into a tight cylinder. The dough may stick, use a pastry scraper or a sharp knife to help loosen it. Pinch the seam closed. Cut each cylinder into 6 equal portions. Stick each dough portion seam side down into the muffin tin. Cover and let rise in a warm spot for 2 hours, until doubled in size.
For loaves: pat each half into a 6x8 rectangle, and roll on the wider side, as instructed above (note: I did not use the fruit in my loaf, but you certainly could if you wanted). Place each cylinder, seam side down, in a loaf pan. Cover and let rise in a warm spot for 2 hours, until doubled in size.

Preheat the oven to 375 degrees (as always, I recommend preheating for at least an hour to let the oven heat to a very even temperature). Beat the egg with the milk and brush the tops of the risen muffins (or loaves). Bake the muffins for 25-30 minutes, until they are a deep golden brown. Bake loaves for 30-35 minutes. Let cool briefly in their pans before transferring to a wire rack to cool completely. You absolutely MUST eat a muffin while still deliriously warm, if you don't I'm not sure that we can be friends any more.

Once everything has cooled completely it can be wrapped in parchment and stored in a plastic bag for up to three days, or frozen for a month. I'm sorry there aren't more pictures of the baking process, but once I touched the dough it was all over my hands and I just had to get it done. Make brioche this weekend!

Tuesday, April 04, 2006
The Ultimate Cuban Sandwich
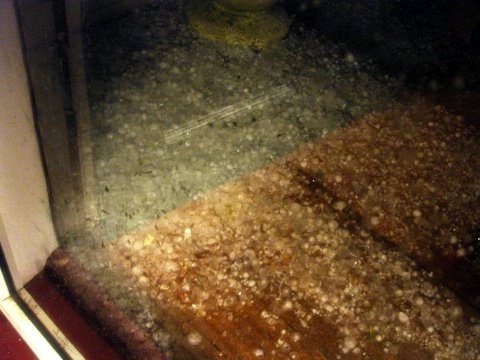
First off, a bit of business out of the way. If you are wondering where the garden update I promised is, take a look at the visitor we had a couple of days ago. Just when I was planning to photograph the beginnings of an abundant Spring, this hail beat my lettuce and herbs to near-death, but they are slowly recovering in the tranquil (for now) Spring sunshine. Sorry for the dim light, it was 2 o'clock in the morning:

And now on to the real food talk...
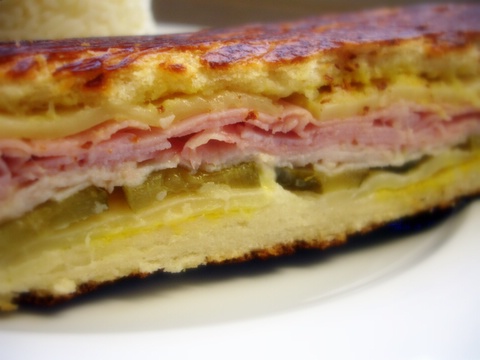
We were so lucky for a while. Sweet Knoxville, TN, landlocked in a mountain valley, managed to contain a tiny, perfect Cuban restaurant that sold the best Cuban sandwiches this side of Miami. But all good things, apparently, must come to an end, and Alex of Alex's Havana Cafe closed up shop and retired, leaving people like me completely bereft.
With my old, evil job I traveled to Miami a few times, and the best sandwiches I had there were on par with Alex's--crispy, tender bread housing a pork, pickle, and cheese concoction that I swear was addictive. So addictive, in fact, that I decided to set out and try to replicate them.

This may be my highest baking achievement yet--making a bread that involved a starter and required a very specific texture and flavor. Dear readers, I succeeded. And Chris might leave me if I don't stop crowing about it. But the bread, the sandwiches, they were perfect. Perfect! The only improvement would have been actually having some leftover pork in there, but the turkey and ham were more than acceptable. Turkey isn't traditional, but it lightens the flavor and calorie content, and you won't notice a difference, I swear.
I am unapologetic about the length of the recipe below, because it is worth every step and kind of fun (if you've never played with starter before). If you don't have ready access to a superb Cuban sandwich in your area, I implore you to give this a try.
Ultimate Cuban Sandwiches
makes 6 loaves
the day before you bake:
for the starter:
.75 tsp active dry yeast
one third cup warm water
one third cup bread flour
Dissolve the yeast in the water and stir in the flour. Cover the bowl and allow the starter to ripen in the refrigerator for 24 hours.

After 24 hours it will be gooey and bubbly and slightly sour smelling. You will only use half of the starter in this recipe--leftover starter will keep for several days in the refrigerator or can be frozen for up to 6 months.

for the dough:
4 tsp active dry yeast
1 Tbsp sugar
1.5 cups warm water
4 Tbsp melted butter
1/2 starter batch
1 Tbsp salt
4-5 cups bread flour
In a warm mixing bowl, dissolve the yeast and sugar in 3 tablespoons warm water. When the mixture is foamy (5 to 10 minutes), stir in the butter, the remaining water and the 1/2 batch of starter. Mix well with a wooden spoon.
Stir in the salt and 4 cups of the flour, using the dough hook attachment on a stand mixer. Mix for 2 minutes on speed 2. Once incorporated, continue kneading for 8-10 minutes, until smooth and elastic. Add the remaining flour as needed, but not too much. The dough should be pliable, but not sticky.

Transfer the dough to a lightly oiled bowl, cover, and let rise in a warm draft free spot until doubled in bulk, about 45 minutes. I recommend going ahead and preheating your oven to 375 degrees, and resting the dough on the stove top.

Punch down the dough. To make the loaves, divide the dough into 6 equal pieces. Roll each to form a 12 inch long log or cylinder. Using the heel of your hand, flatten each log slightly. Divide the cylinders between 2 baking sheets with 4 inches space between, cover, and let rise in a warm place until doubles in bulk, about 1 hour.
If you haven't already, preheat your oven to 375 degrees. In the bottom of your oven, place a small metal bowl or pan filled with hot water. The steam is supposed to help make a nice crust on the loaves, but I don't know if it did much. Bake until the bread is golden brown on top and sounds hollow when thumped on the bottom, about 30 minutes.

Let the loaves cool slightly, transfer the breads onto a wire rack to cool completely.
for the sandwiches:
Mayonnaise
Yellow mustard
roast pork (if you have it)
sliced deli ham
sliced deli turkey (optional)
sliced deli Swiss cheese
Several dill pickle slices
Butter, softened to room temperature

Split a Cuban loaf and butter the outside crust. Spread mayonnaise and mustard inside, then layer with thinly sliced ingredients--from top to bottom, I use:
Swiss cheese
pickle slices
turkey
ham
roast pork

If you have a panini grill, well good for you, use that. Me? I say who needs a panini maker or a sandwich press when you have a small baking sheet and a tea kettle full of water?

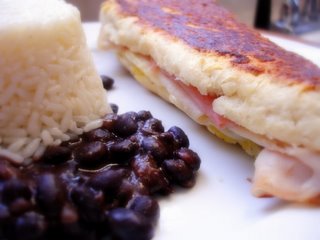
Toast on a griddle or grill pan over medium heat until nice and brown and the cheese is slightly melted. Slice the sandwich diagonally and serve with black beans, rice, and fried plantains if you've got them (I couldn't get my hands on any in the 10 minutes I spent at one store). These sandwiches are freaking great.

And now on to the real food talk...
We were so lucky for a while. Sweet Knoxville, TN, landlocked in a mountain valley, managed to contain a tiny, perfect Cuban restaurant that sold the best Cuban sandwiches this side of Miami. But all good things, apparently, must come to an end, and Alex of Alex's Havana Cafe closed up shop and retired, leaving people like me completely bereft.
With my old, evil job I traveled to Miami a few times, and the best sandwiches I had there were on par with Alex's--crispy, tender bread housing a pork, pickle, and cheese concoction that I swear was addictive. So addictive, in fact, that I decided to set out and try to replicate them.

This may be my highest baking achievement yet--making a bread that involved a starter and required a very specific texture and flavor. Dear readers, I succeeded. And Chris might leave me if I don't stop crowing about it. But the bread, the sandwiches, they were perfect. Perfect! The only improvement would have been actually having some leftover pork in there, but the turkey and ham were more than acceptable. Turkey isn't traditional, but it lightens the flavor and calorie content, and you won't notice a difference, I swear.
I am unapologetic about the length of the recipe below, because it is worth every step and kind of fun (if you've never played with starter before). If you don't have ready access to a superb Cuban sandwich in your area, I implore you to give this a try.
Ultimate Cuban Sandwiches
makes 6 loaves
the day before you bake:
for the starter:
.75 tsp active dry yeast
one third cup warm water
one third cup bread flour
Dissolve the yeast in the water and stir in the flour. Cover the bowl and allow the starter to ripen in the refrigerator for 24 hours.
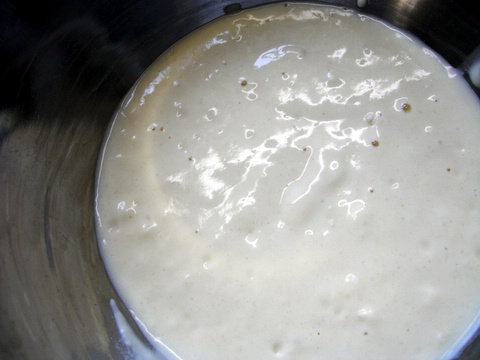
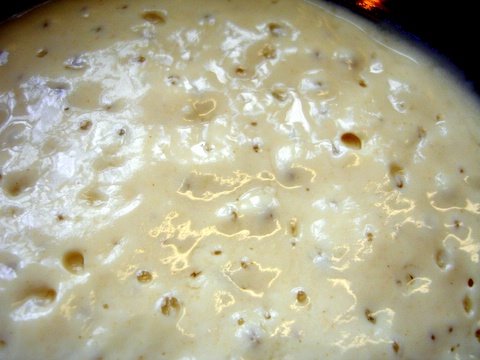
After 24 hours it will be gooey and bubbly and slightly sour smelling. You will only use half of the starter in this recipe--leftover starter will keep for several days in the refrigerator or can be frozen for up to 6 months.
for the dough:
4 tsp active dry yeast
1 Tbsp sugar
1.5 cups warm water
4 Tbsp melted butter
1/2 starter batch
1 Tbsp salt
4-5 cups bread flour
In a warm mixing bowl, dissolve the yeast and sugar in 3 tablespoons warm water. When the mixture is foamy (5 to 10 minutes), stir in the butter, the remaining water and the 1/2 batch of starter. Mix well with a wooden spoon.
Stir in the salt and 4 cups of the flour, using the dough hook attachment on a stand mixer. Mix for 2 minutes on speed 2. Once incorporated, continue kneading for 8-10 minutes, until smooth and elastic. Add the remaining flour as needed, but not too much. The dough should be pliable, but not sticky.
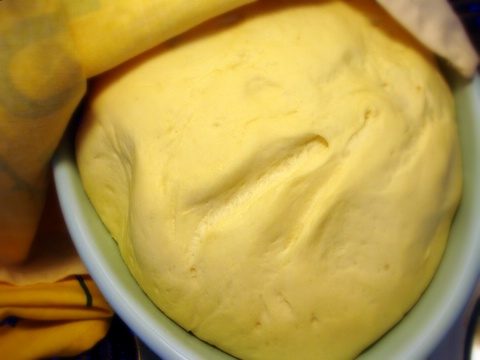
Transfer the dough to a lightly oiled bowl, cover, and let rise in a warm draft free spot until doubled in bulk, about 45 minutes. I recommend going ahead and preheating your oven to 375 degrees, and resting the dough on the stove top.

Punch down the dough. To make the loaves, divide the dough into 6 equal pieces. Roll each to form a 12 inch long log or cylinder. Using the heel of your hand, flatten each log slightly. Divide the cylinders between 2 baking sheets with 4 inches space between, cover, and let rise in a warm place until doubles in bulk, about 1 hour.
If you haven't already, preheat your oven to 375 degrees. In the bottom of your oven, place a small metal bowl or pan filled with hot water. The steam is supposed to help make a nice crust on the loaves, but I don't know if it did much. Bake until the bread is golden brown on top and sounds hollow when thumped on the bottom, about 30 minutes.

Let the loaves cool slightly, transfer the breads onto a wire rack to cool completely.
for the sandwiches:
Mayonnaise
Yellow mustard
roast pork (if you have it)
sliced deli ham
sliced deli turkey (optional)
sliced deli Swiss cheese
Several dill pickle slices
Butter, softened to room temperature

Split a Cuban loaf and butter the outside crust. Spread mayonnaise and mustard inside, then layer with thinly sliced ingredients--from top to bottom, I use:
Swiss cheese
pickle slices
turkey
ham
roast pork
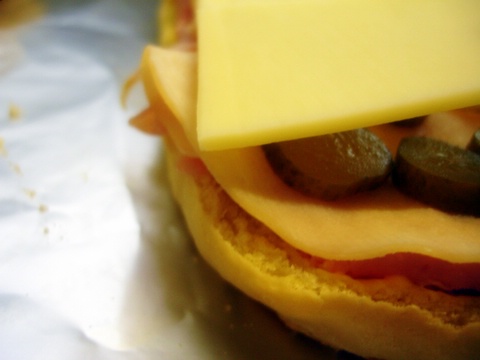
If you have a panini grill, well good for you, use that. Me? I say who needs a panini maker or a sandwich press when you have a small baking sheet and a tea kettle full of water?
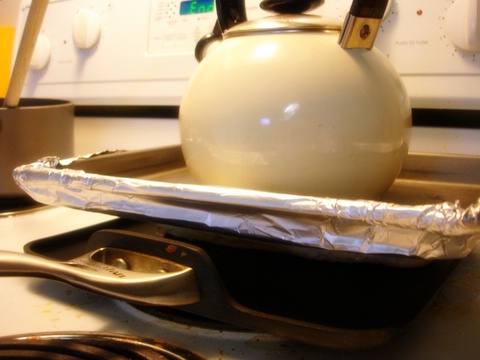
Toast on a griddle or grill pan over medium heat until nice and brown and the cheese is slightly melted. Slice the sandwich diagonally and serve with black beans, rice, and fried plantains if you've got them (I couldn't get my hands on any in the 10 minutes I spent at one store). These sandwiches are freaking great.

Monday, April 03, 2006
Perfect (for me) Chocolate Chip Cookies
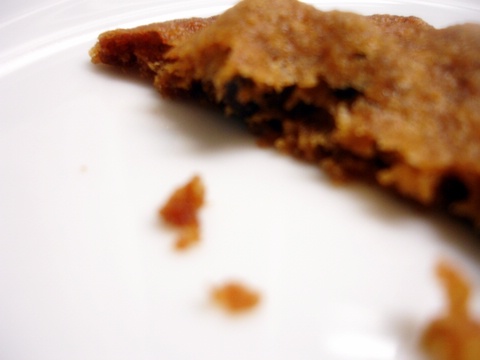
I am very specific about chocolate chip cookies: I like crispy, buttery, brown sugary cookies with only a few chips. I like chocolate a lot, but with these cookies I want it to complement the crisp cookie rather act as the singular, overpowering, dominant flavor.
With thanks to my guru Jeffrey Steingarten, I have come pretty close to my ideal. His recipe was near perfect, but had too much chocolate for my tastes, and I used dark brown sugar to his light/dark mixture (I just love the molasses flavor). You can always add more chocolate chips to this recipe if you want.

For this batch I also baked a few cookies with no chips mixed in at all, testing my theory that I really like the cookie bit more than the chocolate. They were delicious, and would be wonderful with some ginger grated in. Next time.
Crispy Chocolate Chip Cookies
makes 4 dozen
2 cups all-purpose flour
1 tsp sea salt
1 tsp baking soda
2 sticks butter, room temperature
1 cup dark brown sugar, packed
.75 cup white sugar
1 tsp vanilla extract
1 Tbsp. water
1 egg
.75 cup chocolate chips
Preheat oven to 375 degrees. Combine flour, salt, and baking soda in a bowl, set aside. In a mixing bowl, cream the butter and both kinds of sugar. Add the vanilla, water, and egg, and beat together. Beat in flour mixture, then stir in chocolate chips by hand (if you want some non-chocolate cookies, now is the time to take some dough out).
Drop onto Silpat-lined baking sheets (or you can use non-stick aluminum foil) using a mini ice cream scooper for uniform cookies. Bake for about 10 minutes. Let cool for at least 5 minutes on the sheet before removing to a wire rack for further cooling--they will be soft, but will crisp up as they cool. Enjoy!

With thanks to my guru Jeffrey Steingarten, I have come pretty close to my ideal. His recipe was near perfect, but had too much chocolate for my tastes, and I used dark brown sugar to his light/dark mixture (I just love the molasses flavor). You can always add more chocolate chips to this recipe if you want.

For this batch I also baked a few cookies with no chips mixed in at all, testing my theory that I really like the cookie bit more than the chocolate. They were delicious, and would be wonderful with some ginger grated in. Next time.
Crispy Chocolate Chip Cookies
makes 4 dozen
2 cups all-purpose flour
1 tsp sea salt
1 tsp baking soda
2 sticks butter, room temperature
1 cup dark brown sugar, packed
.75 cup white sugar
1 tsp vanilla extract
1 Tbsp. water
1 egg
.75 cup chocolate chips
Preheat oven to 375 degrees. Combine flour, salt, and baking soda in a bowl, set aside. In a mixing bowl, cream the butter and both kinds of sugar. Add the vanilla, water, and egg, and beat together. Beat in flour mixture, then stir in chocolate chips by hand (if you want some non-chocolate cookies, now is the time to take some dough out).
Drop onto Silpat-lined baking sheets (or you can use non-stick aluminum foil) using a mini ice cream scooper for uniform cookies. Bake for about 10 minutes. Let cool for at least 5 minutes on the sheet before removing to a wire rack for further cooling--they will be soft, but will crisp up as they cool. Enjoy!
Monday, March 27, 2006
Garlic Basil Hearthbread

I know. I know what I said about being done with dough. However, when faced with the choice of baking some sort of bread to go with tonights thrown together dinner, or trudging out to the store to buy something inferior, it seemed really stupid to not just make something.
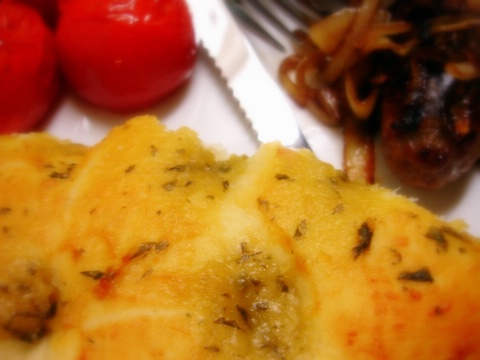
And so, I went with something I have at least been looking forward to making, Nigella Lawson's Garlic Parsley Hearthbreads. I made some changes, like using basil instead of parsley, and even ended up tweaking the basic structure of the recipe a bit--I love Nigella, but I have found that her bread recipes are not always very clear. No worries, though, because the end result was fantastic: chewy, garlicky, deliciously savory bread, a perfect highlight to an otherwise lackluster meal.
Garlic Basil Hearthbread
serves 4-6
1 packet active dry yeast
1.5 cups warm water
pinch sugar
3.5-4 cups all-purpose flour
1 Tbsp sea salt
5 tablespoons olive oil, plus more for topping
3 medium heads garlic
handful basil leaves, chopped
Mix yeast, sugar and warm water together in a warmed mixing bowl. Add 3.5 cups flour, salt, and olive oil and use a dough hook attachment to mix for 1 minute on speed 2. Continue kneading, adding additional flour if the dough is too sticky. Knead for 5-6 minutes.
Form dough into a ball (it will be soft and slightly sticky), and place in oiled bowl, turning to coat top. Cover with plastic wrap and let rise in a warm place for 1 hour.

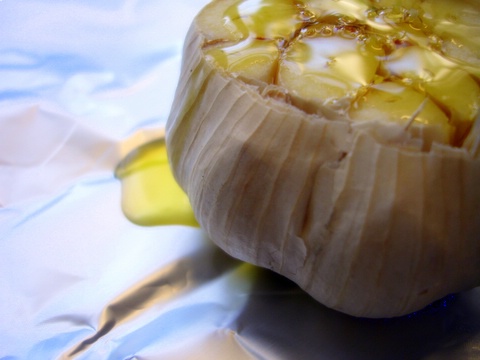
While dough is rising, preheat oven to 350 degrees. Cut the top of each garlic head off, drizzle with olive oil, and wrap loosely in aluminum foil, sealing edges well. Roast for 45 minutes (the top of your stovetop will be a nice warm place for dough rising). Remove from foil and let cool.

Once dough has risen, punch down and let sit for 10 more minutes. Divide dough in half. Roll each half of dough into a rough oval shape on parchment paper. Place each piece of parchment with the rolled dough on a baking sheet, cover and let rise for an additional 25 minutes, until puffy. Increase oven temperature to 400 degrees and let preheat for a good while--this tip came from Kevin at Seriously Good, and I think it really helped--thanks, K!


Squeeze roasted garlic into a bowl (it should be very soft). Using a fork, mix in basil and enough olive oil to make a paste. Using your fingers, make several indentations on each loaf of flatbread. Spread the garlic mixture evenly over each loaf. Bake for 20-25 minutes, until the bread is a light golden brown and the garlic is a deeper golden color. If your baking sheets will not fit on the same shelf in the oven, rotate the two sheets halfway through baking. Sprinkle with salt right out of the oven.

Serve warm with any number of dishes. We enjoyed this fragrant yeasty wonder with grilled sausages, caramelized onions, and grilled tomatoes--wonderful

Subscribe to:
Posts (Atom)