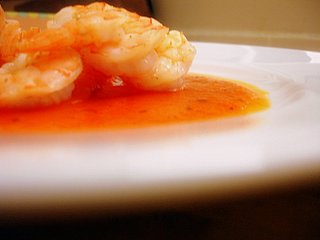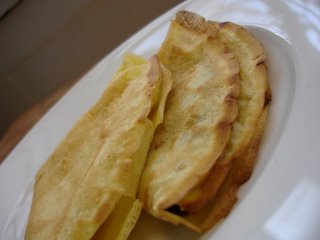
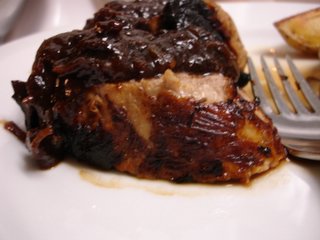
This is a deceptively easy recipe that looks and tastes like it was hard work. I should point out that the marinated pork tenderloin is very good on it's own, so skip the sauce if you aren't in the mood. But do try it sometime, it is a nice balance of sweet, tangy, and savory.
The marinade is hard to mess up, so don't stress about amounts. If you don't have honey? Use some sugar! Don't have the herbs called for? Toss in whatever you've got! You just want to end up with a balance of flavors in the marinade, along with some fat.
for the sauce:
3/4 cup chopped, pitted dried plums (prunes)
2 cups apple cider
1/2 tsp cider vinegar
4 sprigs fresh thyme
olive oil
1 medium yellow onion, thinly sliced
2 cloves minced garlic
for the marinated pork:
1 1-lb. pork tenderloin (or 4-1 inch think center loin chops)
sea salt
freshly ground pepper
dijon mustard
dried thyme
dried parsley
honey
olive oil
Place the tenderloin in a large ziploc bag, and dump in a few glugs (yes, it's an official measurement) of olive oil, a dollop of mustard, a squeeze or two of honey, and a few liberal pinches of the salt, pepper, thyme, and parsley. Close the bag and squish the marinade around the meat until it seems mixed well. Refrigerate for at least an hour before cooking.
Preheat oven to 400 degrees, and take the meat out of the refrigerator to allow it to warm up a bit.
In a small saucepan, bring the prunes, cider, vinegar, and thyme to a boil. Lower heat to medium low and simmer until reduced by half (it should coat the back of a spoon nicely).
Meanwhile, heat the oil in a large oven-safe skillet over medium-high heat. Season pork with salt and pepper and sear, browning all sides. Place skillet in the oven and roast for about 25 minutes, or until a meat thermometer reads 160 degrees (still light pink in the center). Remove meat from skillet and place on a platter, with aluminum foil tented over to keep warm. Return skillet (with meat drippings) to medium-low heat, add the onions, and cook until soft. Add garlic, cook for a minute more, then the cider/plum mixture. Simmer 2-3 minutes more, scraping up browned bits from the bottom of the pan, then spoon over pork.
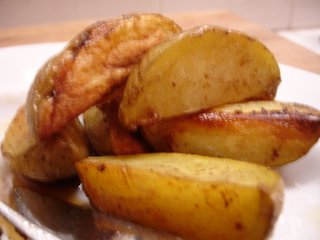
This pork is very good with a side of crispy roasted potatoes. I make my potatoes like this: put a chunk of butter and a glug of olive oil in a ceramic or glass baking pan, and put the pan in the oven as it preheats to 400 degrees. While the butter is melting and the pan is getting hot, quarter some smallish Yukon Gold potatoes. When the butter is melted, take the pan out and swirl the fat around to coat the bottom. Sprinkle the oil with sea salt and pepper, then tip the potato slices in. Give a good stir to coat the potatoes, then roast for at least 45 minutes. You want them to be really good and brown and crispy in the end.
With this delicious hot meal, I like a simple green salad. Other good green vegetables are steamed or sauteed asparagus, or wilted spinach. Enjoy!
Mrs. C.
Tuesday, January 31, 2006
Perfect Vinaigrette
If you've ever had the pleasure of traveling to France, this is the closest I had ever had to the simple, creamy vinaigrette you will get at nearly any classic bistro. It is silky and the perfect balance of tangy and savory. I love it drizzled over a nice mixture of greens, or tossed in a pile of buttery escarole (I love escarole, can you tell?). You could, of course, serve it with more complicated salads, but I like it so much with simpler combinations.
Notice, there is a raw egg yolk in this recipe. While I tend to think that if you use a nice fresh egg, you've got nothing to worry about, you can find pasturized eggs in a lot of grocery stores. But really, the egg yolk does give it that extra something (and no, that something is not salmonella!), so don't leave it out. Remember, there is raw egg in almost all traditional Ceasar salad dressings as well, so it isn't an uncommon practice.
Perfect Vinaigrette
serves 6 to 8
3 Tbsp vinegar (I recommend champagne, white or red wine, or tarragon vinegar)
1/2 tsp Dijon mustard
1/2 tsp finely minced or grated garlic
1 large egg yolk
3/4 tsp sea salt
1/4 tsp freshly ground pepper
1/2 cup good olive oil
I keep a couple of glass bottles on hand for the purpose of making salad dressing. Should you have one on hand, just dump all of the ingredients in and give it a thorough shaking. If you don't, whisk together all of the ingredients save the oil, then slowly drizzle the oil in, whisking as you go.
Toss the dressing with greens and serve immediately.
Mrs. C.
Monday, January 30, 2006
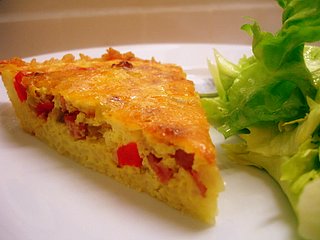
Sausage and Red Pepper Quiche with Rice Crust
Apologies for not recapping over the weekend. I had a lovely three day migraine, and while I did manage to cook the aforementioned quiche, I couldn't get it together enough to write about it.
I love quiche, but my standard offering is not the most healthful of dishes. It features mushrooms, shallots, handfuls of Gruyere, heavy cream and of course eggs. Once you pile those ingredients in a flakey pastry crust you have a pretty decadent little pie on your hands. So, when I read a recipe in Cooking Light magazine that featured a rice crust, I was immediately intrigued. I was not, however, impressed with the original recipe, which included "fat free cheese product" and "egg substitute". I have no problem with healthy cooking, and I think a lot of what I make would fall in the healthy category, but these ingredients do not qualify as real food for me, and you will never find them featured in my pantry.
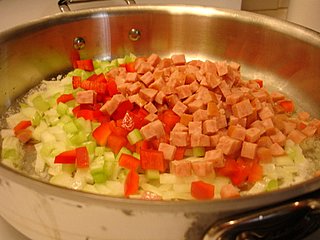
So, I took the rice crust and my goal to lighten up my usual quiche and set to work. I had a red pepper that needed to be eaten, along with some keilbasa that needed a purpose. I diced up the pepper and sausage, and some celery and onion for good measure. From there, I came up with the following recipe:
Sausage and Red Pepper Quiche with Rice Crust
Serves 4-6
for the crust:
2 cups cooked white rice, cooled (for these purposes, boil-in-bag rice is perfect)
few dashes garlic powder
few dashes onion powder
1/2 tsp sea salt
1 egg
1/2 Tbsp melted butter
1/4 cup finely shredded cheddar cheese (reduced fat is okay, but no fat free!)
for the filling:
half an onion, finely chopped
2 medium stalks of celery, finely chopped
roughly half a cup of chopped red bell pepper
half of an 8 oz. link of keilbasa, diced*
half Tbsp butter
olive oil
1 large clove garlic, grated or minced
3 large eggs
large dollop plain yogurt
few glugs half and half, or whole milk
several dashes Tabasco
1/4 cup finely shredded cheddar cheese
*I think that nearly any sausage would be good here, particularly andouille or chorizo
Preheat oven to 375 degrees.
Spray a 9-inch pie pan with cooking spray, or grease with olive oil. To prepare crust, combine all crust ingredients and spread the mixture into the bottom and up the sides of the pie pan. Try to get the crust spread evenly, with no visible holes.
To prepare filling, heat the remaining butter and a few dashes olive oil in a skillet over medium high heat. Add vegetables, garlic, and sausage; saute 5-8 minutes. You want to soften the vegetables, sweat out any liquid in them, and brown the sausage nicely. Spoon the mixture evenly into the rice crust.
Whisk together the eggs, yogurt, half and half, and Tabasco, pour over the sausage and vegetable mixture. Sprinkle the remaining cheese evenly over the top.
Bake at 375 degrees for 30-35 minutes or until the center is set and the top is browned. Let stand for 5 minutes before serving.
We had this with a green salad and my perfect vinaigrette (recipe posted above). It is also good leftover, either cold or reheated in the microwave. I think this would be a good brunch or lunch dish, and you could easily substitute ingredients depending on what you have. I am planning to try to use this recipe to make mini-quiches in a muffin pan, I will let you know how that turns out!
Mrs. C.
Edited to add: if you decide to try this without sausage, you may want to add salt to the egg mixture before pouring over.
Friday, January 27, 2006
Crepes With Butter and Sugar, With Chocolate, With...
Oh, dear. I was hoping I could keep this from going public, but the revelation seems to be inevitable: I have a Problem. To be specific, I have a Crepe Problem. I used to be able to keep this in line by living so very far away from France, so far the only real source for my addiction. But something very bad has happened. I found a recipe. And even worse, I seem to be not-so-bad at making the little devils.
I started out using a wonderful Calphalon non-stick griddle that was a wedding gift. The non-stickiness of it made the flipping and whatnot a breeze, but the wide open squareness of the surface made for some very wobbly, ugly crepes. However, due to my Problem, I took no umbrance with wolfing these hideous reject crepes down as soon as they slid off the griddle. When I fist got started, all I wanted was butter and sugar crepes (beurre et sucre if you want to order from the source). The Mr. quickly took me to the dark side, suggesting bittersweet chocolate, then chocolate and banana. If you've never had a hot, fresh crepe dripping with silky chocolate, well...you probably shouldn't or you will end up like me. And it is a sad state, indeed.
I never knew crepes were so simple! Well, that's not true, I knew the recipe was simple, but I never dreamed they were the kind of things I could turn out within an hour whenever the craving hit me.
Last weekend, Mr. Canada and I happily spent some wedding store credit and a generous gift card at a local department store and Williams-Sonoma, respectively. One of the things we picked up (and honestly one of the last things I felt the kitchen tool kit was lacking), was an 8" nonstick omelette pan. Little did I know, this teeny little pan was only going to fuel my Problem. Tonight, after a lovely dinner with my father, sister, and her boyfriend (the gift certificate dinner was waylaid by Mr. C's late night of work), I came home with that dangerous look in my eye. "Crepes," I thought. That was literally all that I thought. Sad, isn't it?
I whipped up the batter first off, because it needs to sit for at least 40 minutes to allow the ingredients to meld completely. While I was (patiently, I promise) waiting, I was thinking about my plan of attack. Would I use the griddle, which made delicious crepes that were decidedly not round, or...I wonder if the wee omelette pan would work? Since you really shouldn't machine wash nonstick pans, I decided having a smaller pan to wash was enough of a reason to try it out.
And, oh it worked so well. For the first time, I was making the prettiest, tastiest, ROUND crepes that had ever left my kitchen. Maybe it was one too many glasses of wine, maybe it was hormones, but it nearly brought a tear to my eye. Nearly, I said nearly. Let's not get overemotional here.
So, I pass on to you, with this story of personal triumph, the crepe recipe that I have found best for me. There are a million recipes out there with less egg, more flour, more butter, whatever, but this is perfect for my obsessive palate.
Basic Crepe Recipe
makes 14-16 small crepes
4 eggs
1 cup flour
1/2 cup milk
1/2 cup water
1/2 tsp salt
2 Tbsp. melted butter
Dump all of the ingredients into a blender and mix for 30 seconds. Scrape down the sides and mix for 15 seconds more. Cover and let sit for 40 minutes to an hour.
Pulse once more before cooking the crepes up. Heat an 8 inch nonstick omelette pan over medium heat (or an omelette pan if you're high falutin", but then why are you reading my recipe?).
Hold the pan up off the heat with your left hand. With your right hand, take a 1/4 cup measuring cup, and dip out about that much batter and pour into the warm pan. Before putting the pan back onto the heat, swirl it around until it coats the base of the pan evenly, and only creeps up the sides a bit. Place the pan back on the burner. After about a minute (I know this isn't precise, but all stoves and pans are different), use the edge of a knife or a thin plastic spatula to lift one edge. Using your fingers and the knife/spatula, flip the crepe over to the other side. They aren't as delicate as they seem, so try to not stress over tearing it up. Also, as a warning, your first crepe (like the first pancake you make), may not be all that hot. If it isn't, it is a nice thing to munch on while you make the pretty ones.
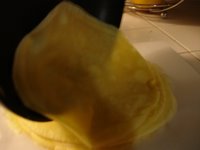
Once you flip the crepe over, you've got a choice in course of action. One course is to cook the other side and then slide the crepes into a tidy little pile*. Or, once you have flipped to the other side, you can go ahead and fill the little suckers. There are a lot of options for fillings, you can really go wild here, but I'll give a few basic examples of savory and sweet:
Sweet Fillings:
butter and sugar (spread the butter around until melted, sprinkle sugar over)
butter and jam
chocolate—dark or milk, just make it good quality
chocolate and sliced banana
chocolate and jam (today I had dark chocolate with homemade tart plum jam)
Nutella (chocolate and hazelnut spread from the gods--if you haven't tried it, do, but don't yell at me after you eat the whole jar)
Savory Fillings:
Guyere (or almost any cheese, really, but Gruyere is wonderful)
Cheese with tomatoes and cracked pepper
Cheese with tomatoes and parma ham (or rotisserie chicken)
Wild mushrooms, herbs, and a drizzle of cream
Once the crepe is filled to your liking, you just need to fold it up and serve it to your soon-to-be adoring fans (or to yourself, your own biggest fan). There are three basic ways that I fold crepes, so if you are looking for swans or other forms of origami, you’ve got the wrong very-amateur-cooking blog.
The first, and the one I use for the most simply filled crepes (butter and sugar, just cheese, etc.) is also the most complicated. Luckily, it’s still ridiculously easy. Fold the crepe in half, using your fingers or your flexible plastic spatula, then fold in half again. You now have a nice, accidentally pretty, little crepe on your hands.
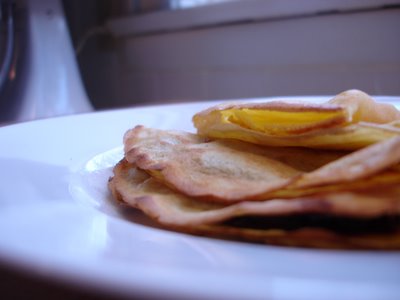
Another way of folding is even more simple—just fold the crepe in half. I find that this is nice for anything with a chunkier filling—chocolate and banana for example.
Lastly, you can just roll that baby up like a fat cigar. While this is a traditional way of serving some crepe dishes, I really don’t use it much. I like the distribution of flavors and textures you get with the other methods.
Martha Stewart recently made a cake out of layers and layers of crepes with hazelnut cream in between that nearly made me weep. It gave me an idea for a confection this summer, maybe with raspberry jam layers and a lemon glaze poured over, swirled with a little dark chocolate for good measure? I need to be stopped.
Okay, all you ever wanted to know, and a lot you didn’t, about one of my favorite things in the world. Crepes are impressive, but so simple, and they freeze really well. *If you want to freeze them, stack them up with parchment or wax paper in between each crepe, and stash away in a large freezer bag once the crepes have cooled. Just heat them up in a pan, where you can go directly to the filling. Eat them within a couple of weeks, but I’d be surprised if they make it more than a few days. Enjoy!
Mrs. C.
Thursday, January 26, 2006
The Pantry
I admit, I've never understood people that hate to go to the grocery store. I mean, I see things to hate about the act (lugging all of the bags in and paying through the nose for it come to mind), but I love the endless possibilities of a grocery trip.
I used to shop willy-nilly (the technical term), picking whatever I wished with no regard to planning whole meals or anything like that. Because of this, I often had to go to the store several times in one week to get even the most mediocre of meals thrown together. I also did the majority of my shopping at our local fancy-dan grocery: The Fresh Market. Ah, The Fresh Market. It is warm, no harsh fluorescence, and soothing classical music is piped in. There is free coffee. The selection--be it cheese, meat, produce, candy--cannot be beat. But the prices. Oy.
So, with my new thrifty mindset (I'm really trying here), I've started planning. And really planning, it usually takes me a good couple of hours of sifting through cookbooks, magazines, and my cute recipe box to pick out what will be on the menu for the next week, then I have to make my ridiculous list. And yes, I am the first to admit that it is ridiculous. I split it up according to sections of the grocery store, so I never have to double back. This makes a lot of sense, no? But I get teased, even by the checkers. Sigh.
Anyway, the point I am trying to arrive at is that for the first time in a long time I have a well-appointed pantry. I have old standbys that I always have on hand, I have a good assortment of spices, I am generally well prepared for the repeat offenders in my culinary line-up. Most of the time I only buy meat, produce, and dairy at the market, with a few cooking supplies or canned goods to replenish the stock.
So, I thought that every few days or so I would talk about one or two of my pantry staples. I won't get too long winded, and I'm not going to state the obvious (we all have eggs, right?). But these are a few ingredients that my pantry feels indecent without:
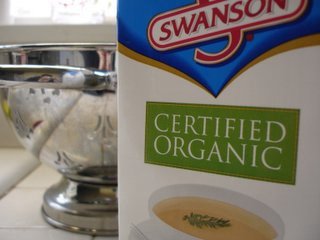
Swanson Organic Chicken Stock
Yes, in a perfect world I have a constant supply of homemade chicken stock at my disposal, but in reality...no. That's not to say I don't ever make stock, in fact, I just popped two quarts of seafood stock in the freezer last week. But I use chicken stock a lot, a splash here, a cup there, etc. So, after spending too much on attractively packaged stock at the aforementioned fancy-dan market, I sampled this new offering at my trusty Food City. It is cheaper, certified Organic, and tastes just as good as the more expensive brand. Makes me a happy girl, it does.
I believe we are going out to dinner tonight (riding high on Christmas gift certificates), so I'm not sure if there will be a dinner entry this evening. I am, however, planning to post up a favorite vegetarian recipe for my silly non-meat-eating friends.
Mrs. C.
Chicken Soft Tacos with Tequila Spiked Pico
I'm just going to say it right off the bat: don't knock it until you've tried it, tequila haters--a few drops of the stuff takes this pico de gallo from ordinary to special. Don't you want special pico? I know you do.
Okay? Okay.
Now, tonight's dinner is not exactly exciting. Rather, it is pretty representative of the dinners we have the night before a big grocery trip. I keep this chicken in the freezer to have on hand for just these kinds of nights. Everything else is in the pantry, or the vegetable basket.
The chicken is one of those classic crockpot recipes that has been given to me by several helpful friends over the past few months. It couldn't be easier: place your boneless, skinless breasts in the pot, pour a jar of salsa over it (it doesn't have to be very nice, I usually use Pace), and pour a packet of taco seasoning over the whole lot. Cook on low for 6-8 hours. Remove the chicken from the pot and shred it up (it shouldn't take any effort at all). Add a few dollops of sour cream to the salsa mixture in the pot, mix it up, and pour it over the chicken. Viola! Instant taco, burrito, or enchilada filling. Eat some right away and freeze a portion for nights where creativity escapes you.
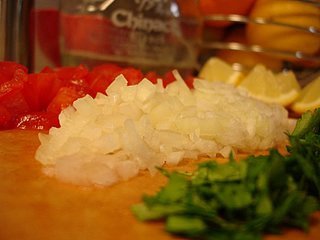
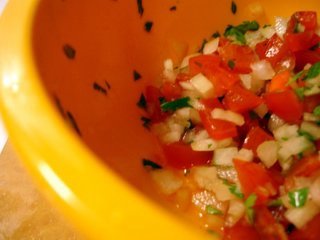
Tonight I decided to whip up some pico de gallo, using what I had and improvising the rest. It is actually pretty good, but it would be even better with the finely diced fresh jalapeno, lime juice, garlic, and avocado I normally add. But tonight's recipe was simply:
Tequila Spiked Pico
4 medium Campari tomatoes*
half a yellow onion
splash or two of tequila
lemon (or lime) juice to taste
cilantro
sea salt
tabasco sauce (optional)
*these seem to be the only tomatoes worth eating this time of year, I really love them and use them a lot
Seed and dice your tomatoes, and dice the onion. Chop up the cilantro as finely as you can (it sticks to the blade something awful, so I usually don't put too much effort into it).
Toss these three ingredients together in a bowl, add tequila and lemon juice and sprinkle with salt. Mix well and let sit for a half hour or so (lets the flavors introduce themselves to each other). Do a little taste test and add more lemon, salt, or tequila if needed (you don't want to really taste the tequila, it should just enhance the other flavors).
If you like a little spice, you can add a few dashes of Tabasco as well.
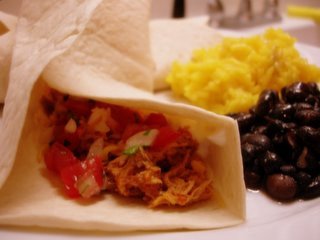
As for the tacos themselves, they are pretty self explanatory. The crockpot chicken described above with pico and sour cream, wrapped up in a soft flour tortilla. The requisite black beans and rice as a side is up to you, but that's what we almost always have. You get bonus points for some slices of fried plantain as a sweet garnish.
Sometimes you just need a simple, filling dinner.
Mrs. C.
Staple: Jerk Chicken Breasts
Another regular feature on our dinner table, this Jerk Chicken is flavorful and tastes like a lot more work than it is. Even better, once you have all of the spices on hand, you have the means to make it again and again.
You don't have to have the chicken on a bed of potatoes and scallions, but if you do you will find that the fat from the chicken and the flavorful spices caramalize the potatoes and make them into a delicious side dish. Often I will just steam up a little broccoli and make it a complete meal.
You can use boneless, skinless chicken breasts if you want to, but I encourage you to try the bone-in, skin-on variety. Not only are they almost always cheaper (due to less processing), I find that the skin and bones lock in the moisture and flavor excellently. If you do decide to go with boneless, skinless, toss the potatoes in a little more vegetable oil before roasting, they need the fat to get nice and crisp.
Jerk Chicken Breasts
1 bunch scallions, trimmed
2 Tbsp paprika
1.5 Tbsp garlic powder
1.5 tsp ground allspice
1 tsp ground nutmeg
.75 tsp cayenne pepper more or less, depending on preferred spice level)
1 tsp kosher salt
.25 tsp freshly ground pepper
1.5 Tbsp olive oil
Juice of half a lime
2 Tbsp molasses
3-4 bone-in, skin on chicken breasts
3-5 Yukon Gold potatoes, cleaned and sliced into wedges, tossed in a splash of vegetable oil
lime wedges (optional)
Heat oven to 400 degrees.
Place the potato wedges in a large roasting pan and roast them for 15 minutes alone, then remove from the oven and lay the scallions on top of them. This dish is also good with sweet potatoes, but if you use them this pre-roasting is not necessary.
In a small bowl, combine the spices, oil, lime juice, and molasses. Spread the spice mixture over and under the chicken skin*. Place the chicken on top of the scallions and potatoes.
Roast until the chicken is cooked through, about 45 minutes. Serve the chicken with the roasted scallions, potatoes, and lime wedges, if desired.
*For even stronger flavor, let the spice-rubbed chicken sit in the refrigerator for 6-8 hours before cooking. If you have time in the morning before work, this would be a great time to throw it together.
This chicken is also good leftover and I have a jerk chicken salad in mind for the summertime. Enjoy!
Mrs. C.
Salmon Croquettes
Part of this whole unemployed cooking experiment was not to just continue improvising meals, but to actually use the spate of very nice cookbooks I've received over the years. I have never been one for cookbooks, preferring to feel my way through whatever strikes my fancy. However, I am finding that using cookbooks can not only add some real stunners to your repertoire, it can also give you a good jumping off point for more ingredient ad-libbing. Tonight’s excellent recipe was inspired by Nigella Lawson’s recipe for Salmon Fish Cakes, from her wonderful cookbook “Nigella Bites”. Her recipe is near perfect, very simple and delicious, but I just couldn’t stand to not jazz it up a tad. I think you will like them.
Call them croquettes, fish cakes, or whatever you want—these golden patties are the ultimate comfort food and a wonderful use for leftover mashed potatoes. I was inspired to make them after finding canned salmon at the market for $1 a can, and once I saw that it was wild salmon, I couldn’t resist. In fact, this seems to be a best kept secret of the fishing industry—all canned salmon is wild. That’s right, for $1 a can, you can get delicious wild salmon that would cost you who knows what if it were fresh. Of course, it does come from a can, so it’s hardly material for a fine dinner party or anything. At least the cans are nice to look at in your pantry.
Regardless, these fish cakes are simply divine. Mr. C. hugged me after eating them, and to paraphrase Amanda Hesser, “anything that elicits a hug is good by me.” He started going on about how he would order them in a restaurant, and could I please make them again? Pretty please?
Since all of the ingredients are in my pantry on a regular basis, I would be happy to.
Salmon Croquettes
with assistance from Nigella Lawson
makes 7-9 patties
for the croquettes:
1 ½ cups cold mashed potatoes (I use peeled red potatoes, mashed with butter and a little cream)
14-15 oz. canned salmon, with any visible bones picked out
pinch cayenne pepper
zest of ½ a lemon
salt and pepper
1 egg
dollop of Dijon mustard (optional)
scant ¼ cup finely chopped celery (optional)
scant ¼ cup finely chopped onion (optional)
for coating and frying:
2 eggs
scant ½ cup bread crumbs or matzo meal (if you can’t be bothered to make your own breadcrumbs, try the matzo rather than storebought crumbs. It’s much better)
about a ¼ cup of butter
2 Tbsp vegetable oil
In a large bowl, mix together all of the fishcake ingredients. You can use your hands, but I like to use an old fashioned potato masher. I find that it really mixes the ingredients thoroughly, and even better, your hands don’t smell all fishy. Well, yet.
Cover a baking sheet with aluminum foil, and use your hands (sorry) to form fat, palm sized patties. Place these on the baking sheet and let stand in the fridge for at least an hour to firm up. It works even better to pop them in the freezer for a bit.*
Beat the eggs in a wide, shallow soup bowl and sprinkle the bread crumbs or matzo meal onto a dinner plate. One at a time, dip the cakes into the egg first, then into the crumbs, covering it in a thorough crust. When you’re all done, put the butter and oil in a large frying pan, heat it until the butter foams, and then fry the croquettes on each side until the crusts are a deep golden brown. Be careful when flipping them, they will still be a bit soft.
As you cook them, let them drain for a minute on a few paper towels. Squeeze a little lemon on top and eat with lots of ketchup. I turned my nose up at Lawson’s ketchup recommendation, but she was right, it was delicious. I served these with a pile of seared green beans, cooked in lemon and olive oil.
*At this point, you can freeze the patties, individually wrapped. These little wonders are just the thing when you are home alone for the evening but just can’t face a night of popcorn or cheese and crackers. Not that there is anything wrong with cheese and crackers. To cook after freezing there is no need to thaw, just dredge the frozen slabs in the egg, then breadcrumbs, fry until golden brown on each side, then pop in an oven set at 250 degrees for 40 minutes to an hour. Yum.
Mrs. C.
Wednesday, January 25, 2006
Bad Bread. Bad!
You will quickly find that not everything I make turns out as delicious and pretty as some things. This week, for some unknown reason, I felt the need to bake bread. I was still riding high on the success of some bagels I made two weeks ago (my first tryst with yeast), and was feeling triumphant. I chose a simple white bread recipe from Nigella Lawson, the provider of the excellent bagel recipe.
I felt pretty confident about the whole thing, the dough looked as it was supposed to, but it turned out to be the heaviest, densest bread ever. The crumb was very, very tight, and once the warmth of the oven wore off, it was pretty much inedible.
Look at it, though! Doesn't that almost look like real bread, for eating, even?
But, do not dismay, the bread will go to good use. I am going to fry up some homemade croutons, and then I will use a great hunk of it to make breadcrumbs for tonight's meal (Salmon Croquettes).
Mrs. C.
Gâteau au Yaourt à la Myrtille (Blueberry Yogurt Cake):
This afternoon I was craving something sweet and happened across this recipe on Chocolate and Zucchini (a real food blog, you should definitely read it if you haven't already). That blog's proprietress, Clotilde, had first made this cake plain, without blueberries, her take on a classicly simple French cake. Her addition of the blueberries makes it deliciously sweet-tart, really nice for breakfast or with a cup of tea in the afternoon. I find that the texture and flavor is like a fluffy blueberry muffin, and the next time I make it I may just experiement with muffin tins. It is moist and delicious.
Clotilde, like any good cook, calls for full fat yogurt in this recipe, but I only had fat-free and it is still delicious. I added in two tablespoons of melted butter to add a little of the dairy fat back in, but I don't know that it is necessary. This cake is almost too easy to believe, make it for brunch one weekend and impress your friends. Mine (pictured below) turned out a little fluffier and a lighter brown than Clotilde's, but I think that is attributed to the fat-free yogurt, as well as the use of a silicone cake pan, rather than a metal one.
Gâteau au Yaourt (yogurt cake)
by Clotilde Dusoulier
2 eggs
1 cup of whole milk plain unsweetened yogurt
1 cup sugar
1/2 cup vegetable oil
2 cups all-purpose flour
1 tablespoon baking powder
1 teaspoon vanilla paste/extract
1 tablespoon light rum
8 oz. frozen organic blueberries (optional)
Preheat the oven to 350°, line the bottom of a round ten-inch cake pan with parchment paper and grease the sides (if you use a silicone cake pan, this is probably not necessary). In a large mixing-bowl, combine the yogurt, eggs, sugar, vanilla, oil and rum. In another bowl, sift together the flour and baking powder. Add the flour mixture into the yogurt mixture, and blend together -- don't overwork the dough. Fold in the blueberries, if you are using them. Pour the batter into the prepared cake pan, and bake for 30 to 35 minutes, until the top is golden brown and a cake tester comes out clean. Let stand for ten minutes, run a knife around to loosen, and turn out on a rack to cool.
I think this could be very good with other fruits, and I'm looking forward to tinkering with it. Maybe mango next time?
Mrs. C.
Edited to add a picture of my creation--it looked so delicious that I immediately had another piece after taking the picture. Oops?
Flashback: Shrimp with Roasted Red Pepper Sauce
This sauce is so velvety and delicious you will find yourself wanting to try it with other things--do it! It is also very good with scallops and could practically be a soup, too.
Shrimp with Roasted Red Pepper Sauce
serves 4-6
About 2 pounds large shrimp, peeled and deveined
4 medium red bell peppers (I've used orange peppers before, it worked well)
2 cups chicken stock (I really like Swanson's Organic stock)
1/2 cup dry white wine
1.5 tsp. chopped fresh basil
2 Tbsp. chilled butter, cut into small pieces
1/4 tsp. sea salt
olive oil
fresh basil
Thread shrimp onto skewers (I recommend threading onto two skewers, this will keep the shrimp from spinning around when you flip while cooking). Cover and chill.
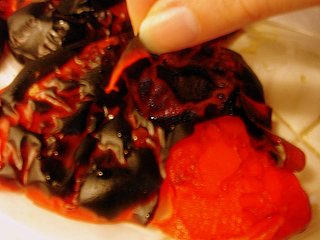
Preheat broiler. Cut peppers in half lengthwise, discard seeds and membranes. Place pepper halves, skin sides up, on a foil-lined baking sheet; flatten them with your hand. Broil 15 minutes or until really blackened. Place peppers in a heavy ziploc bag, seal, and let them stand for 10 minutes. Peel peppers and discard blackened skins.
Place peppers, broth, and wine in a blender, process until very smooth. Combine pepper mixture and basil in a small saucepan. Bring to a gentle boil, cook until reduced to approx. 1.5 cups (5-8 minutes). Reduce to medium-low heat and gradually add pieces of butter, stirring until melted. Cover and keep warm.
Prepare grill or preheat broiler again. Sprinkle the shrimp with sea salt and a little pepper (I like to use white pepper, it is milder), and place on a grill rack or broiler pan coated with a slick of olive oil. Grill 2-3 minutes per side, until opaque and pink.
Add one more piece of butter to the sauce to finish it, then pool some on a plate or in a shallow bowl. Pile the shrimp artfully on top, garnish with shredded basil. Also good with some steamed broccoli thrown in.
Oh, I need to make this again. It is so pretty and really delicious.
Mrs. C.
Spaghetti alla Carbonara
Last night's dinner was borne out of an intense craving. I think I have only had carbonara once, so it was kind of a strange thing to be obsessed with, but whatever, I had all of the ingredients (oh, bless the stocked pantry!), so it was a go.
I was using David Leite's (of Leite's Culinaria fame), and it looked simple and delicious, which is really how a classic carbonara should be. No frills, just eggs, some sort of cured meat (ideally pancetta, but I made do with thick cut market bacon), cheese, and pepper, over some good pasta of course. I really prefer De Cecchio pasta, but I wasn't about to drive across town to get it, so I was happy to use Barilla Spaghetti Rigate instead--it has little ridges that really cling to sauce, I love it.
The recipe itself was missing...something. It was tasty, in a comforting, kind of bland way, but it could have benefitted from something else--maybe a drizzle of cream--to keep it from getting too dry. Leite's recommendation to add reserved pasta water is a good one; if you don't you will be left with the dryest concoction this side of a desert.
To counter the richness of the dish, I served this with a pile of very tender escarole, drizzled with good olive oil, a squeeze of lemon, and some cracked pepper. Mr. Canada found it a little too sour (he is really a fan of more creamy dressings), but I found it to be the perfect foil against the eggy, bacony, cheesy pasta. A glass of wine (Hardy's Merlot, I believe), and we had a pretty delicious, incredibly easy, meal on our hands.
Spaghetti alla Carbonara
by David Leite
Serves 4
Alla carbonara means "in the manner of the coal miner" (or the coal miner's wife). According to legend, the dish was popular with miners because the few ingredients could easily be carried or, in the case of eggs, pocketed from henhouses on the way to work. When appetites knocked, a simple campfire in the woods was all that was needed to make an elegant meal. The liberal use of pepper is considered a modern-day metaphor for the specks of coal that would inevitably drop from the miners' clothing onto the plates of pasta.
Ingredients
1 tablespoon olive oil
6 ounces thickly sliced pancetta, diced into 1/4-inch pieces
2 tablespoons salt
1 pound spaghetti
3 large eggs plus 1 egg yolk, well beaten
3/4 cup grated Parmigiano-Reggiano combined with 1/4 cup grated Pecorino Romano
3/4 cup of boiling pasta water
Freshly ground black pepper, to taste
Method
1. In a large skillet, heat the olive oil over medium heat. Add the pancetta and cook, stirring often, until it's crisp. Set the pan aside.
2. Bring 6 quarts of water to a boil. Add the salt and the spaghetti and cook until al dente. Drain, reserving the 3/4 cup of pasta water, and return the pasta while it's very hot to the pan, set over very low heat. Immediately add the eggs, half the cheese, the reserved pancetta and any rendered fat, and toss well. Add just enough of the pasta water* to make the mixture creamy. Sprinkle liberally with pepper and serve at once. Pass the remaining cheese at the table.
*I recommend keeping some of the pasta water on hand to drizzle over leftovers as well, then you won't have disappointingly dry pasta the next day.
Enjoy!
Mrs. C.
An explanation...
I certainly never expected to be unemployed for this long. When I quit my completely horrible job at the end of last August, I fully expected to have a job to come back to when I returned from my honeymoon at the end of September (more on that later). But, instead, it is several months later and I've not had much more than a handful of freelance jobs to occupy my time.
I have always loved to cook, and one of the (many) things I despised about my former profession was the way a 70 hour work week left no time for cooking. At best, I would cook one night a week, subsisting the rest of the time on take out or whatever could be thrown together in less than five minutes. I was too tired to cook, and my husband does not get home from his job until 8pm, most nights, so he wasn't exactly around to cook, either. I felt doughy and sad and dissatisfied with my culinary life.
So, with all of this new found time on my hands, and also with our new financial situation in mind, we stopped getting take-out. We stopped going out to eat. We stopped foraging for nuts and berries in the wilds of our pantry. And I started cooking.
Today, as I was doing some prep for tonight's dinner, I realized that life would not always be this way. I was not going to be able to cook meals that took half a day of preparation once I (hopefully) found a full time job. I wasn't going to have the luxury of time required to make fresh baked goods, or complicated French recipes, or anything more than basic recipes. Now, the basics can be delicious, and I certainly still rely on a few, but it hit me that I didn't want to forget this time in the kitchen. I didn't want to forget the things I've made, hits and misses, and the recipes that I hoped would become my own family heirlooms.
So, here I am. I do hope this will not be yet another failed attempt at blogging, I really do. I have another erstwhile online diary that I haven't updated in months and months. But, seeing as I have all of this cooking that I truly want to document, hopefully that will encourage me to be a little more reliable.
So, that's what you'll get if anyone should be reading this: a recap of recipes, reviews, rejects, failures, and delights. Should anything random from the rest of my life sneak in (oh...like my neverending job search), that will just be like the bonus features on a DVD. Thanks for reading, I'll try to be entertaining.
Mrs. C.
Subscribe to:
Posts (Atom)